Showing posts with label chocolate. Show all posts

Saturday, August 29, 2015

Gluten free chocolate cake

Chocolate cake, ganache, whipped cream, and peaches!

 Here is a recipe for a gluten free chocolate cake that is delicious and moist and doesn’t dry out for a few days!


My spouse’s grandmother has been gluten-free for a couple years now, and one of the tips she gave me recently was to use Bob’s Red Mill’s 1 for 1 Gluten Free flour blend. I have used their other all-purpose GF mix in the past and didn’t like it as much, possibly because of the use of bean flour, but the 1 for 1 mix is made of different flours.


This is not a paid advertisement for Bob's Red Mill, nor do they know who I am (though Bob Moore did get his seminary degree through my Alma Mater!) I just love their products.

The idea behind 1 for 1 is that you can adapt a normal (gluten-containing) recipe to be gluten free, just by using this mix instead of wheat flour, and it should turn out well. It is the same idea as the Better Batter and Cup for Cup mixes, but I have not ever used those blends, so I can’t attest to how good those are.

This recipe is nearly identical to Pioneer Woman’s recipe for strawberry Nutella cake . The differences are the use of a gluten-free flour blend, that this recipe only makes one layer of cake instead of two, and I added an extra egg which helps keep the cake from crumbling.


Gluten free chocolate cake

Adapted from Pioneer Woman

Ingredients

1 stick of butter (8 tablespoons)
2 heaping tablespoons cocoa powder
½ cup boiling water
1 cup gluten-free flour mix (Bob’s Red Mill 1 for 1 flour blend is what I have tested this recipe with)
1 cup granulated sugar
A pinch of salt
¼ cup buttermilk
2 eggs
½ teaspoon baking soda

½ teaspoon vanilla extract or spiced rum

Makes one layer. For a double-layer cake, double all ingredients and use two cake pans.


Preheat oven to 350 F. Grease a round 9” cake pan, and line the bottom of the pan with parchment paper that is lightly greased (The first time I made this recipe the cake fell apart but when I made it again with the parchment paper it helped prevent this).

Parchment paper is really helpful for preventing GF baked goods from sticking 

Melt the butter in a saucepan over low heat. Once melted, add the cocoa powder and stir until smooth. Add the boiling water and stir again. Turn off the heat and set the cocoa mix aside.


Here is the melted butter, cocoa powder, and boiling water all mixed together

Mix the buttermilk, baking soda, eggs, and vanilla or rum together in a small bowl or mixing cup (I ran out of vanilla extract and used some amber rum that I had on hand and it added a nice flavor to the cake. Use what flavoring you prefer).  Set aside.


Buttermilk, baking soda, eggs, flavoring mixed together

Mix the sugar, GF flour, and salt together in a large bowl. 

The dry ingredients whisked together

Slowly add the cocoa mixture to the flour mixture and stir until smooth.

At the beginning of mixing... 

And after mixing a while the batter turns to a dough-like consistency

Pour in the buttermilk mixture and mix until all ingredients are well incorporated.

Buttermilk mixture just added

 Batter after everything has been well mixed

Pour the batter into the greased cake pan, and then bake for 17-27 minutes (I live at 7200 feet and needed 26 minutes) testing for doneness

Before baking

Let the cake cool in the pan for about 5 minutes before sliding a butter knife around the edges of the cake, and then carefully turn the cake onto a wire rack to cool completely before proceeding to decorating the cake.

After baking. You can see marks where I stuck a fork in to test if it had baked long enough

The pan is probably too hot to touch at this point, so use hot pads to flip the cake, or wait until the pan is cool enough to touch safely. I like to put the cake rack upside down on top of the pan, and then carefully invert the two together. Tough to describe and tougher to photograph by yourself!


Don't forget to remove the parchment paper

Now decorate the cake however you like! Use Nutella like in Pioneer Woman's recipe, or buttercream frosting, or with a layer of ganache, then whipped cream, then fruit as in my pictures. I have made this twice with a layer of ganache and then a thick layer of whipped cream. I have made it with both chopped peaches macerated in a little sugar (shown below), and with sliced strawberries and pitted cherries (last picture). Use any fruit that sounds good!

With peaches

~artsy photo~ with strawberries and cherries!

*allergy note: this cake could be made dairy free by swapping butter for margarine, and the buttermilk for soy or almond milk with a teaspoon of lemon juice added a few minutes before mixing it with the other ingredients.

Sunday, February 12, 2012

Molten Chocolate Lava Cake, Gluten Free

You can see here why it is called "molten" and "lava" since a little batter spills out of the finished cake.

We don't typically do a lot to celebrate Valentine's Day at my household. It can be a fun holiday, if you are seeing someone; but it can be painful if you are single, or a hassle if you're not, or both either way. I suppose it just seems strange when a holiday insists that you must be romantic in a certain way on a certain day, especially a holiday named for a Roman martyr. Valentine's Day is nice excuse for chocolate and a date night, though.

Which was part of the inspiration for making a gluten-free chocolate lava cake. I keep seeing glutenous chocolate recipes everywhere on the Internet because it is February. I used to make this recipe a fair bit, because it is quick, easy, and delicious, yet seems quite fancy. So I adapted it to be gluten-free. It can also be made totally dairy-free if you use coconut oil instead of butter. Both are delicious.

This is a pretty fantastic dessert, and just in time for Valentine's Day, whether you celebrate it or not!

Molten Chocolate Lava Cake, Gluten Free

Adapted from Brandielle's recipe

Also, the Pioneer Woman made the original recipe with a bunch of step-by-step photos a few years ago, if you are so inclined.

Serves 2 (can easily double or triple)

4 ounces dark chocolate
¼ cup butter or coconut oil (½ a stick)
½ cup powdered sugar
½ cup gf flour, such as sorghum
2 eggs
1 tsp vanilla

Preheat oven to 425 F.

Melt the chocolate and butter together by microwaving in a microwave-safe bowl in 20 second increments. Stir between microwaving, until the contents of the bowl are completely melted. Allow the mixture to cool for 3-5 minutes.

Add the sugar, flour, eggs, and vanilla, and whisk until the mixture is smooth. Spoon the batter into two well-greased ramekins. Bake for 13-14 minutes, or until soft in the middle, but not liquid.

Remove the ramekins from the oven, and let cool for a few minutes. Invert the ramekins onto a plate. The cake should have a bit of gooey batter in the middle, hence the “molten” and “lava” in the title. Eat and enjoy!


Stirring the melted chocolate and butter/coconut oil

Stirring in the flour, sugar, vanilla, and eggs. It is important to let the chocolate cool off a bit before adding in the eggs, so that they don't congeal or cook.

The batter prior to baking.

After baking.

Inverted.

Delicious chocolate middle! It is like having chocolate sauce on your cake, but without the extra work.

Sunday, January 29, 2012

Delicious Chocolate and Blood Orange Cupcakes

(Which I was going to call “Gluten-free vegan chocolate cupcakes with a customization option which I made with blood oranges” but I realized that this was a rather long-winded way of titling something which, quite simply, was delicious).


These pictures are not the greatest; I was in a hurry to finish baking before a meeting.

A lot of people in my life have food allergies/intolerances now, and so it is pretty common to have long email threads before a gathering to see who can eat what, and what people should bring that everyone can eat. This is very confusing for folks who do not live with these dietary issues, particularly when it comes to baking. So, usually I am asked to handle the desert. Which I am happy to do!

Most recently, we needed to accommodate egg, dairy, and gluten issues, so the brownies that I normally make were out. I had made these mocha cupcakes before, and they were delicious, but there were young kids at the gathering, and I didn't think their parents would appreciate a caffeine-laden desert. But I liked the idea of cupcakes (according to The Internet, cupcakes are a culinary trend that is becoming unfashionable) (I think that is ridiculous, cupcakes have always been a mainstay of birthday parties and gatherings where a layer cake is impractical) (plus they are super-kid friendly and seem to make a bit less of a mess) (good heavens this is a lot of parentheticals) so I tweaked the already-fabulous recipe into something that would work for me.

And thus we have this recipe for a plain chocolate cupcake, which is also vegan and gluten-free.

Chocolate cupcakes

Adapted from the Gluten-Free Goddess

Dry ingredients

¾ cup sorghum or brown rice flour
¾ cup cornstarch
½ cup cocoa powder
1 cup granulated sugar
½ rounded tsp sea salt
1 tsp baking soda
1 tsp baking powder
1 tsp xanthan gum

Other ingredients
2 Tbs ground flax seed + 4 Tbs warm water (you can use 2 eggs instead if you prefer)
1 cup non-dairy milk of choice
3 Tbs light-tasting oil
½ tsp vinegar
1 tsp vanilla extract

Preheat oven to 350 F.

Combine the flax with the warm water in a small bowl, and set aside, allowing it to sit for at least five minutes. This is your “egg.”

Combine the dry ingredients in a medium sized bowl, and whisk together to incorporate.

Add in the other ingredients, including the flax “egg,” and mix for 2-3 minutes. This can be done in a stand mixer or with a regular spoon or whisk if you don't mind a work-out. The batter will be very thick, and somewhat stringy.

Fill muffin tins (lined with cupcake liners) about 2/3 full of batter. It may be necessary to smooth out the tops of each tin of batter with the back of a spoon in order to get a smooth top after baking.

Bake cupcakes for 20 minutes.

Makes 1 dozen cupcakes.

Remove from the tin to a wire rack to cool, or else the cupcakes become slightly soggy.

Wait until the cupcakes have completely cooled prior to frosting.

Frosting:

2 cups powdered sugar
2-4 Tbs shortening (I used Spectrum)
¼ cup cocoa powder
1 tsp vanilla extract
2-3 Tbs non-dairy milk

Combine the first four ingredients, then add “milk” one tablespoon at a time. Blend with a stand or hand mixer until fluffy. Add more liquid if necessary. Pipe or spread onto cooled cupcakes.

Unfrosted chocolate cupcakes. Gluten-free baked goods are often a little lumpy if you don't smooth out the batter.

Variation:

After making these, I decided to try to make another variety. I suspect you could make infinite variations to this recipe if you so desired. Basically, you change what spices or extracts you add to the batter, replace cocoa powder with cornstarch if the cupcake is non-chocolate, and use different liquids for the “milk.” I made a blood orange cupcake, and it was fantastic. I used these ingredients, following the instructions above. Please experiment with making your own changes to the recipe, until you find something that you really like! The recipe seems to be pretty forgiving.

Blood orange cupcake variation

Dry ingredients

¾ cup sorghum flour
1 ¼ cup cornstarch
1 cup sugar
½ rounded tsp sea salt
1 tsp baking soda
1 tsp baking powder
1 tsp xanthan gum
half the zest of a blood orange
½ tsp nutmeg

2 Tbs flax + 4 Tbs warm water
3 Tbs oil
½ cup blood orange juice
½ cup coconut milk
2 tsp lemon juice

Frosting:

2 cups powdered sugar
2-4 Tbs shortening
half the zest of a blood orange
~2 Tbs blood orange juice


Unfrosted cupcakes. These were pretty tasty plain.

Pretty pink frosting.


So try either variation, or play with the ingredients and make your own! Cupcakes should be fun as well as tasty.


Wednesday, November 9, 2011

Gluten-free Goddess Brownies


So I have made the Gluten-Free Goddess' recipe for brownies four different times since I went gluten-free. It is a perfect recipe, and it gets raves every time I make it. Everyone thinks it is great, from little kids to college students to my family. I brought them to a research group meeting one time, and didn't tell anyone they were GF. People still thought they were amazing.

Here is her recipe. Seriously, make this even if you aren't gluten-free. I normally use butter instead of coconut oil, and sorghum flour instead of brown rice flour, but I want to make it exactly as written sometime.

That is all.

Wednesday, November 2, 2011

Product review: nut butter


Good heavens did I used to love Nutella. It is delicious, sweet chocolaty goodness. It also is made with milk, and I can't have it.

I have found a substitute that, in some ways, I actually like better!


Justin's Chocolate Hazelnut Butter (website here) is really good. It isn't as sweet as Nutella, and is a bit coarser, and these are things that I like. It tastes distinctly like chocolate and hazelnuts. It is a little pricey, but for a tasty GF/DF/vegan product, that's ok. I will most definitely be buying a jar of this soon.

Disclaimer: neither Nutella or Justin's knows who I am. I just like to eat their products.


Monday, September 12, 2011

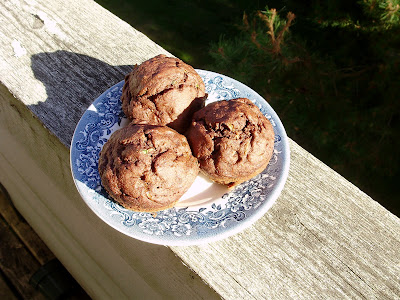
Chocolate Zucchini Muffins

Ah, September. The time of year where kids are going back to school, the weather is beginning to turn, and your friends and neighbors try to pawn off ten-pound zucchinis on you.

I love zucchini, I really do. I have even (unsuccessfully) tried to grow them on my porch before. But it seems funny when I go to church or volunteer at the local high school, and somehow come back with enormous zucchini, because I cannot resist free produce.

Fairly recently, I used up maybe a pound of one such squash (they are a summer squash according to the wikipedia) in ratatouille, and another half-pound of it in soup. But I still had about a foot of the vegetable to use up. I looked at a number of zucchini bread recipes, but most of them used a mere cup of zucchini.

I stumbled upon this recipe, and the fact that it used up 3 cups of zucchini meant I had to try it. It was already a really good recipe, but I made a few tweaks, including making it dairy-free without using soy.

This is the sort of muffin that seems rather virtuous; it contains vegetables, whole grains, and not too much fat or sugar. I like that it isn't very sweet, thar makes it a pretty good breakfast food.

I used an all-purpose gluten-free flour mix, which was about 2:1:1:1:1 of sorghum, millet, quinoa, oat and brown rice flour, respectively.

Make sure that your flours, vanilla extract, cocoa powder etc. are gluten-free and dairy-free, if those allergies apply to you.


Chocolate Zucchini Muffins, gluten and dairy-free

2 cups GF flour mix
1.5 tsp xanthan gum
0.5 tsp salt
1.5 tsp baking soda
0.5 c cocoa powder
1 tsp cinnamon (optional)
0.5 c granulated sugar
0.5 c brown sugar
3 large eggs
0.5 c vegetable oil
1 tsp vanilla extract
3 cups shredded zucchini

Put the shredded zucchini into a strainer over a bowl, and gently press down on the zucchini with the back of a spoon, to drain. Allow excess liquid to drip off while you make the batter. Set aside.

Preheat oven to 350° F.

In a medium bowl, whisk together the flour, gum, salt, baking soda, and cocoa powder. Set aside.

In a large bowl, stir together the sugars, eggs, vegetable oil and vanilla until the batter is combined. Stir in the zucchini. Stir in the flour mixture.

Fill muffin tins half full of batter. Alternatively, place the batter in a bread tin.

Bake muffins for 23-30 minutes, and loaves for 50 minutes. After the muffins or loaf has cooled for five minutes in its tin, remove the muffins/loaf and place on a wire rack to finish cooling. This prevents a soggy surface.


Makes 24 muffins

Sunday, July 31, 2011

Gluten-free vegan chocolate chip cookies


Food intolerances are a pain in the ass.

There, I said it.

Since my last post, my full food allergies/intolerance tests came back, and the list is a lot longer than gluten. Dairy is no longer allowed. The exception, for now, is butter. My doctor says it is ok because it is 99% fat, and most of my issues are with the proteins and sugars in milk. But there is a chance that I am so sensitive to it that I may need to cut that out of my diet as well. I have hopes that I will be allowed small amounts of dairy after it has been eliminated from my diet for a while, but there is no guarantee of that.

I also am not supposed to have asparagus, amaranth, pineapple, or bananas, as my body makes antibodies against them. No amaranth is fine by me, as most GF products don't use it. No asparagus is also fine, as I do not like how it tastes. I am sad about the bananas; they are convenient breakfast food and I love banana bread. However for reasons highlighted in this article, I had already been limiting my consumption of them. I am sad about pineapple, but we didn't eat it that often anyway, as we try to eat our produce in season.

I am able to look on the bright side about a lot of these new food intolerances, but I will be honest with my readers and say that I am taking the no-dairy pretty hard. Unlike traditional glutenous products like bread, there is no good substitute for cheese. True, there are some almond and soy products that look fairly promising, but I just ate some decent almond “cheddar” with my lunch that, after looking at the packaging, turns out contains casein. Casein is one of the proteins in milk, and it is bad for me. There is so much more potential for cross contamination now, and a product that says “non-dairy” or “lactose-free” is not neccesarily dairy-free.

About half of the times I have gone out to eat in the last few months (which is increasingly difficult) I have had to send back my order because there is cheese or bread crumbs on it, when I asked for no cheese, or said “no gluten”. Which, look, I used to work in food service and I know that it can be hard to keep track of customizations to orders, but this is literally playing with my life. I have had to miss several days of work due to accidental cross-contamination now. Also, many people were sympathetic with me about going gluten-free, but suddenly when you add “dairy-free” to that list, a number of people reacted drastically. “I could never do that!” or “I would miss cheese/bread/bananas (etc) too much” or my personal favorite “well what CAN you eat?” I know that people generally aren't well educated about allergies/intolerances until they have to deal with it themselves (and I am guilty of this as well) but I just feel so different from people now. I hate that when I go out to eat in groups, we have to eat in places that won't make me sick; that I have to change the group agenda.

Well, that was a longer rant then I expected.

There is a lot to be happy about, though. First off, why wouldn't I be glad to stop eating the things that were making me sick? I do have more energy now, there is no way I could have worked an 8 hour day even a few months ago. The Man and I still have now idea how I was able to finish school when I had maybe four hours of energy on a good day. And there are a lot of places that make GF and DF foods now. I live in an area that is actually very good about trying to accommodate dietary needs. Also, there is still so much food that I can eat, and I try to do so happily. And, I can make my own baked goods when I am sad that there is something I can't have.

On the subject of making my own baked goods, I made some cookies! At my internship, I am due to make a presentation soon. In the lab I am working in, people always bring snacks to the meeting when they are speaking. Most people bring cookies, usually storebought. Well, I don't want to buy something I can't eat, nor do I want to spend the money on one of the brands that I can (GF baked goods are 2-3 times the cost of glutenous baked goods). And sometimes you just want to eat homemade cookies! So here is a recipe I am am experimenting with, that I hope people will enjoy.

This is adapted from Roben Ryberg's book “You Won't Believe It's Gluten-Free!”

I went ahead and made this recipe vegan too, in order to accommodate more dietary needs.

Some of the ingredients are measured in grams. This is because it is much more precise, and very useful in gluten-free cooking. This post explains why.

Also, please make sure that all of your products are gluten-free before you buy them. I have had a lot of unpleasant surprises when I neglected to read labels even on things that should be GF, such as vanilla. Bob's Red Mill has a great line of GF flours, Thai Kitchen makes GF products, and there are several brands of baking powder and cornstarch that clearly list “gluten-free” on their packaging.

Gluten-Free Vegan Chocolate Chip Cookies

1 Tbs ground flax seed
2 Tbs nearly-boiling water
¾ cup coconut solids*
¼ cup coconut water *
115 grams (1/2 cup packed) brown sugar
80 grams (2/3 cup)cornstarch
50 grams (1/3 cup)GF flour mix**
1 ½ tsp baking powder
¼ tsp salt
1 ½ tsp vanilla
1 ¼ xanthan gum
1 cup of chocolate chips

Make a “flax egg” in a large bowl by whisking the water with the flax seed until it forms a paste. Let stand for 5 minutes.

Add the coconut solids and water, and the sugar to the same bowl. Cream together until smooth.


Add the other ingredients, except for the chocolate chips, and mix together. Add the chocolate chips.

You can see how sticky the dough is.

Optional: Leave dough in the refrigerator for 1-3 hours. This allows the liquid to absorb into the flours better, and makes the dough easier to handle.

Preheat oven to 375. Scoop 1-2 Tbs of dough with a spoon onto a cookie sheet lined with parchment paper or a silpat (if you have neither, then grease the cookie sheet very well). Because these do not spread out when baking as normal dough would, flatten the balls to ¼ inch thick. This is easiest when done with a spatula that has been sprayed with cooking spray.

Bake for 8-12 minutes, depending on how crisp you like your cookies.


So how were these? I enjoyed them quite a bit, but they aren't quite right yet. They are very soft and fluffy, almost like a little pancake! This was improved by baking for 11 minutes instead of nine, and by flattening the cookies more. The flax made them taste a bit more “whole grain” then I wanted in my dessert (normally I love whole grain!) Also they could be a little sweeter. Next time, I will probably use butter or margarine and an egg instead of coconut milk and flax seed. However, they are very good if you want a soft, gluten-free, vegan cookie.

Edit to add: these had a much more cookie-like texture the next day.

* I put a can of coconut milk in the fridge, which allowed the solids to float to the top, and the coconut water to settle. I suspect that pouring a cup of coconut milk straight in this recipe would not work, as the extra fat is needed to replace the butter.

** I made up a master mix of all-purpose GF flour from white and brown-rice flour, teff, almond meal, oat flour, and sorghum. I love it for most of my baking. There are articles on how to come up with your own mix here and here.

Thursday, August 26, 2010

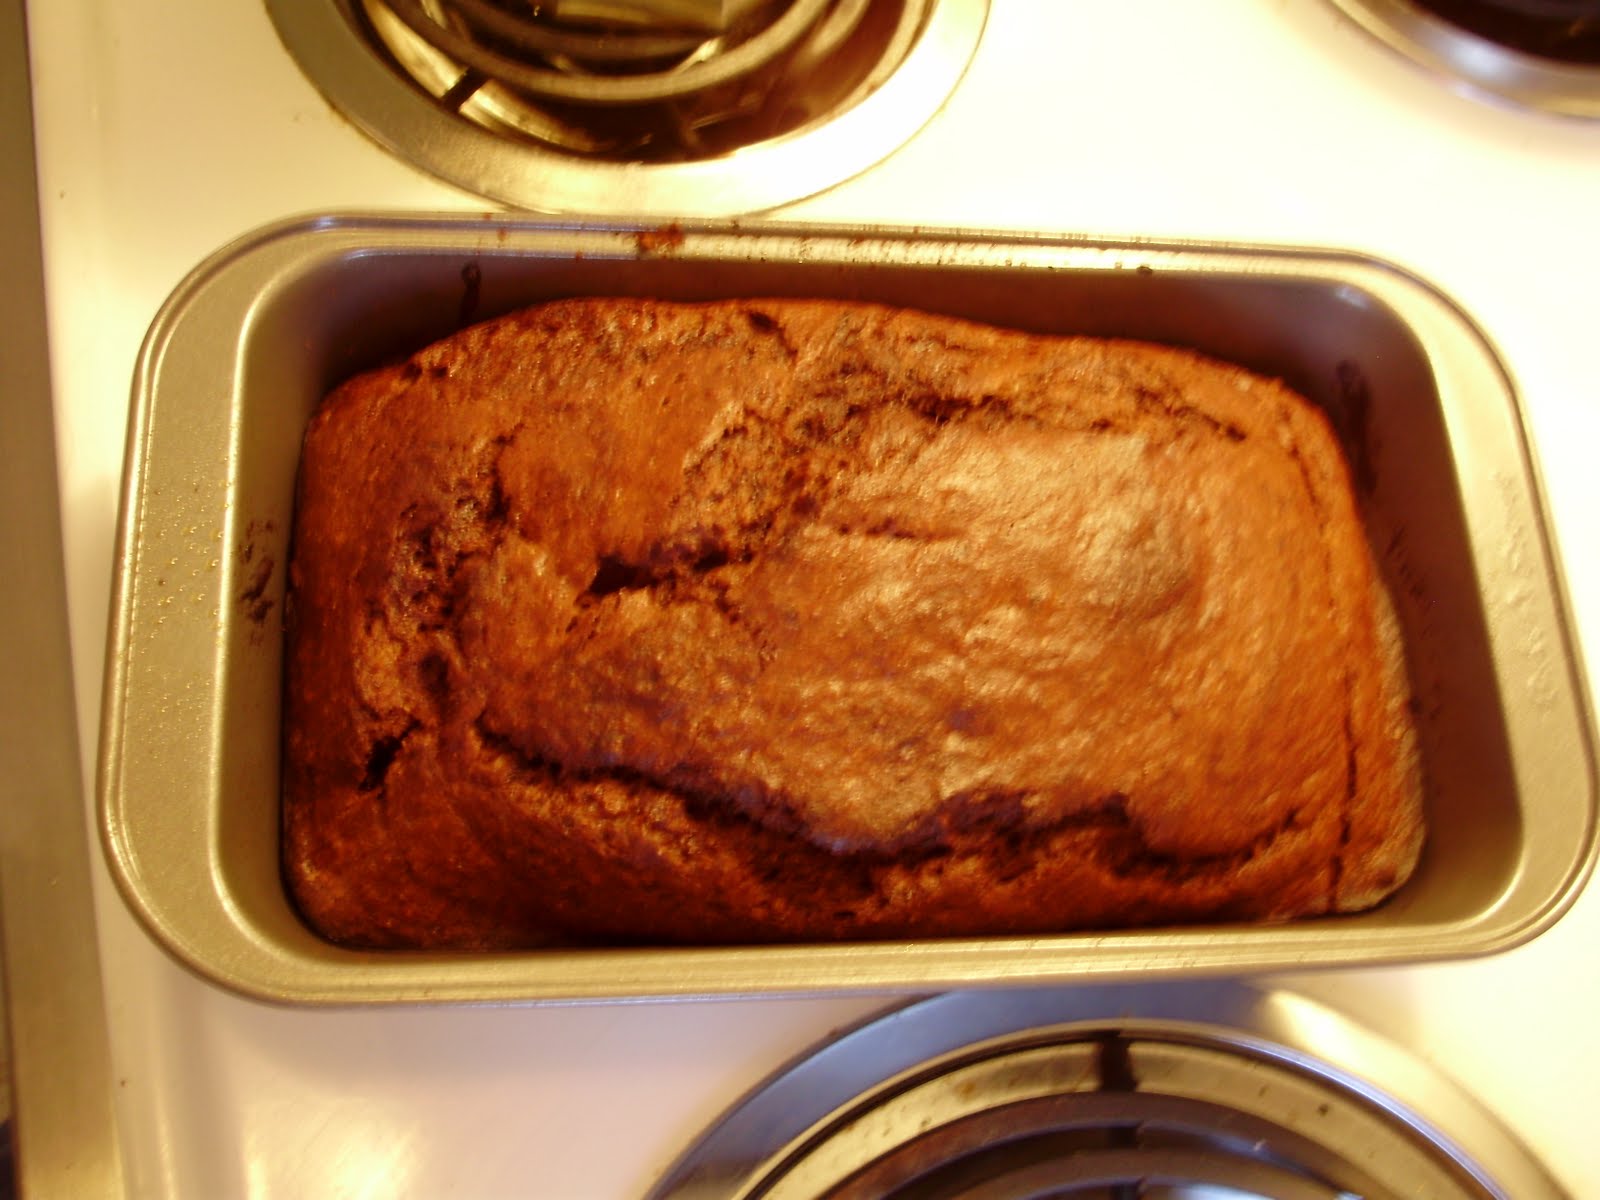
Chocolate Banana Bread


The wonderful thing about chocolate banana bread is that it seems so much more decadent than regular banana bread, but because it uses cocoa powder, not chocolate bars, it is actually better for you! Or at least I suspect it is, given the amazing properties people attach to chocolate's flavenoids and antioxidants (which help neutralize free radicals!).

I digress.

After a camping weekend where the Man and I made breakfast and many people didn't eat the fruit we served, I came back home with too many bananas, and they were turning brown. My answer to too many bananas is always: Banana bread!

No making-of photos today, but here's the recipe, adapted from here.

1 3/4 cup wheat flour (you can use white, but what makes me feel virtuous)
1/4 cup cocoa powder
1 cup white sugar
1 tsp baking powder
1/2 tsp baking soda
1 pinch salt

2 beaten eggs
1/3 cup vegetable oil
2 tablespoons melted butter
3-4 ripe bananas, mashed
1 tsp vanilla extract

Preheat oven to 350 F

In a large bowl, mix together all of the dry ingredients. Set aside.

In a medium bowl, mix together eggs, oil, butter, bananas, and vanilla. Scrape the mixture into the dry ingredients, and gently stir together. (you could add chocolate chips at this point, but why spoil the illusion that this is healthy food? Actually, it is decently healthy.)

Pour batter into a greased breadpan. Bake for 50-65 minutes, it will be done when you stick a fork or toothpick in the bread, and it comes out clean.

Apologies for the blurry picture.

So how was it? Definitely better the next day, but I really enjoyed this. Having more banana then the typical banana bread recipe (normally they say 2) keeps this really moist. I didn't mind the taste of the wheat flour, though the Man said he could tell there was some in the bread, but in my opinion, that is not a bad thing. The chocolate is noticeable, but not in-your-face.

A great way to use up bananas!

Monday, August 16, 2010

Chocolate Guinness Cupcakes!


I had the idea for a cake recipe that combined Guinness (or some other stout) with chocolate about six months ago, but only recently got around to tinkering with a recipe. I have heard of beer bread, and even beer ice cream, so why not a cake? It turns out I am not the first person to come up with the idea, but I gave it my own rendition.

I have to say I am very happy with the results. Aside from the fact that I usually have bad luck with baked goods because dangit, I only measure precisely when I'm in the lab, (where I have the assistance of micropipettes), but also because the stout adds a complexity to the chocolate that I'm pretty sure even non-drinkers would like. It also makes a good leavening agent!

No making of pictures today, but here is the recipe!

**Adapted from this recipe

1 cup of stout
2 sticks of butter
3/4 cup of cocoa powder

2 cups flour
1 3/4 cup white sugar
1/2 tablespoon baking soda
1/2 tsp salt

2 eggs
Rounded 1/2 cup of cream cheese

Preheat oven to 350 F.

Melt the butter in a saucepan. Whisk in the cocoa powder, and add stout. Let the mixture cool.

Blend flour, sugar, baking soda, salt together and blend.

In a large bowl, beat eggs and cream cheese together. (an electric mixer would have made this step much easier!) When blended, add the stout/ chocolate mixture to the eggs about a quarter cup at a time, and blend, continuing this step until the eggs are tempered.
Add the flour mixture and stir until well-mixed.

Fill cupcake liners about 2/3 full. Bake about 13-18 minutes. ( I suspect my old oven runs hotter than most, as most cupcake recipes recommend 350 for 22-25 minutes. Experiment with timing).

Yields approx. 18 cupcakes.

I mixed up a quick buttercream icing, which was good, but not amazing, use your favorite icing recipe.

I want to remake this recipe as a layer cake with ganache filling and a better-tasting buttercream frosting. It would be fantastic!