Showing posts with label bread. Show all posts

Sunday, May 5, 2013

Olive focaccia from gluten-free pizza crust mix


I have been absent from this blog for an entire school year. I had intended to write a post over Christmas break, but then my computer broke and I didn't get it back from the repair place until well after classes had started back up (which was stressful when trying to write a presentation). As it turns out, grad school is hard, and it takes enough time as it is just trying to make nutritious food, let alone blogging about it. Classes are done for the year, though! I just need to get through a final and a qualifying exam, then I will officially be in the program and on my way to getting my PhD. I am excited while also being mildly terrified.

Most weeks there hasn't been a lot of time for baking, and certainly not much time for tinkering with new techniques and recipes. I have looked at this recipe by the Gluten Free Goddess with the intent to make it, but I haven't yet just because of time. Inspired by how delicious it looks, I saw that I had a bunch of pizza crust mixes in my cupboard and decided to experiment. I am very happy with this olive focaccia recipe, both because it is absurdly delicious, and because it is so very easy! I made this in 1.5 hours, and about 1.25 of that was rising and baking. That fits into my (incredibly busy) schedule quite nicely. (No, seriously, some well-meaning ladies at church were telling me that I am just finding excuses to get stressed, and I responded with how excited I am to join my thesis lab, because for most of the summer I will only be working 60 hours a week thanks to no classes and it will be relaxing. They were like "...oh.")

The trick to this is that I used Bob's Red Mill gluten-free pizza crust mix, which makes really good focaccia-style bread, as it turns out. And I accidentally bought four of the crust mixes for about 3 dollars a piece (long story) on Amazon the other day, so this was quite a bit cheaper then some of the 6 dollar GF bread mixes I've used.


 So here is how to make it:

Olive Focaccia from GF pizza crust mix.

Ingredients:

1 package Bob's Red Mill pizza crust mix (you could probably use another brand, but I wouldn't know what is good)
1.5 cups warm water
2 eggs
2 Tbs olive oil, plus more for the pan and the loaf.
30 or so of your favorite olives (pitted!)
Sea salt to taste
Rosmary or other herbs to taste

Mix the warm water (110 F) with the yeast packet from the mix in a large bowl. Let the mixture sit for five minutes, this is "proofing" the yeast.

Add eggs and 2 Tbs of oil, and whisk together. Add the contents of the pizza mix and stir until the dough is well-mixed.

Let the dough rise for 20-30 minutes.

Preheat oven to 400 F.

Oil a 9 inch round cake pan well with olive oil. Transfer the dough from the bowl to the pan, then pour another tablespoon or two of olive oil over the top of the dough, which is both delicious and will also help you during the next step.

Smooth the surface of the dough with your hands so that there is a fairly level surface. The olive oil helps keep your hands from sticking.

Make sure that your olives are fairly well-drained before proceeding.

Push pitted olives into the surface of the dough, making sure they are well-buried, but the tops are still visible. I used a mix of smoked green olives and kalamata olives. Be sure to space the olives apart fairly well.

Sprinkle the top with sea salt. Rosemary or Italian seasoning would have been excellent, but I didn't think of it in time.

Allow the bread to rise for another 10-20 minutes while the oven is heating.

Bake the bread for 25-35 minutes (I only needed 30, but I am baking at 7200 feet and you may need more or less time). The surface of the bread should be lightly brown, and if a fork or toothpick is inserted into the bread, it should come out clean.

Let the bread cool for 20 minutes or so, then slice and enjoy!


If you can't have one of the ingredients in the mix, or don't want to buy a mix, then check out the Gluten-Free Goddess's recipe. I have not made it yet, but it was the inspiration for this!

Saturday, December 3, 2011

Pumpkin bread, gluten, dairy, sugar-free


 Yesterday was my six-month anniversary of going gluten-free. On June 2, I got a phone-call from my doctor, going over the results of some bloodwork, and was told I should stop eating gluten as soon as possible. I resolved myself to a life without gluten, and hopefully some relief from almost-daily joint pain, which on a bad day made it hard even to walk across campus. Now, months later, I have learned a lot and feel amazing compared to where I was in June. Like, I can go on hikes and don't need to spend two days recovering. I have more than two hours of energy each day. Not all of my symptoms are gone, but I am very happy with where I am at compared to just a few months ago. Cooking gluten-free still isn't intuitive, but I think I have gotten a lot better at it. There are very few things the Man has deemed inedible, anyway. So in conclusion, life is pretty awesome right now.

But gluten isn't the whole story. I am dairy-free now too, and I was a lot less dignified when I found that out in July. There were tears, and anger. Now, though, when someone finds out that I am gluten and dairy-intolerant, the reaction tends to be “That sucks, what do you eat?” I am happy to say that there is a lot I can eat. I just have to be a little more creative now. Creativity was part of what inspired this bread recipe.

This particular bread was my response to trying to accommodate a family member with a more limited diet then myself, so that she could eat some bread at our Thanksgiving gathering. There are a lot of good reasons to limit one's sugar intake, and if you make this using the stevia as a sweetener, then the only sugar in the bread is the little bit naturally in the pumpkin. When stevia-sweetened, the bread is almost savory. With the agave or honey, it is only slightly sweet. I enjoyed it both ways.

Pumpkin Bread

Gluten, dairy, and sugar-free

2 Tbs ground flax seed
3 Tbs near-boiling water

15 oz pumpkin puree
2 eggs
3 Tbs agave nectar or honey (see below for stevia substitution)
2 Tbs vegetable oil (or olive oil or melted butter)
2 tsp apple cider vinegar

1 cup almond flour
½ cup brown rice or sorghum flour
½ cup buckwheat flour
½ tsp salt
½ tsp ginger
¾ tsp cinnamon
¼ tsp nutmeg
2 tsp baking powder
1 tsp baking powder

Preheat oven to 350 F. In a large glass bowl, mix together the flax and hot water until they form a paste. Allow it to sit for a minute or two.


Flax seed paste replaces the need for xanthan gum, and adds structure to the bread.


Add in the pumpkin, eggs, agave, oil, and vinegar, and whisk together with an electric beater for a minute.  


Wet ingredients together. I know this is a whisk and not an electric beater; using the latter helps the bread rise more. A whisk works, though!

 Add the flours, salt, spices, baking soda and baking powder and stir together. The batter should be like somewhat fluffy muffin batter. Add a little extra water if needed.

Finished batter 


Grease a baking pan (or line with parchment paper) and pour the batter into the pan. Bake for 40-45 minutes, and allow the bread to cool before slicing, otherwise it will crumble.


Modifications: if you have a nut allergy, the almond flour can be replaced by another flour like sorghum or quinoa. An extra teaspoon or two of oil may be needed, though, as almond flour has a lot of fat in it.

To make this truly sugar free, replace the agave with two or three teaspoons of steavia powder, and add an extra egg white in with the wet ingredients.


Thursday, September 29, 2011

Gluten free bread with polenta


Finally, homemade gluten-free delicious toast!

-->
Good gluten-free bread seems to be a holy grail of GF baking. After eating rice bread that feels and tastes like Styrofoam, or a tasty but tiny loaf that costs $6.50 and is usually out of stock at my store, I get why. I used to pretty much live on toast; it is simple and tasty, and a delicious vehicle for condiments that I like, and it was nearly a tragedy when I first began seeking gluten-free options. What does one do without peanut-butter toast in the morning?

Normally we would just avoid toast and sandwiches altogether, but I just started a job (yay!!) and need convenient meals I can eat while standing. So that is where this bread fits in.

I tried a number of different recipes from different sources, and the one I ended up liking best was this  from the Gluten-Free Goddess. I recently discovered her blog, and I really love her recipes! This is my adaptation, based on what I like, and the humid Pacific Northwest climate I live in. Based on humidity, or the flours you use, you may need to adjust the flour or water. The recipe I linked you to has a lot of commentary on other ways that the recipe can be modified based on climate etc.

My flour mix that I have been using is a ratio of 2:1:1:1:1 of sorghum, millet, quinoa, oat, and brown rice, respectively. Use the flours you like, and as always, make sure they are certified GF.

The Man and I had people over a couple of weeks ago, and fed them this bread. No one complained, even though they can all eat gluten, and they seemed to think it was perfectly fine bread. As a GF baker, I know I have achieved success when people without food allergies like it! The polenta makes this a bit crunchy (though if having the granules in your bread will bother you, use cornmeal or maybe almond meal) and using either honey or molasses makes this bread tender.


-->
Gluten-free bread with polenta

1 c warm water (plus 0.5 c)
2.25 tsp yeast
1 tsp sugar (brown or white)

4 Tbs olive oil
3 Tbs honey or molasses
2 eggs
0.5 tsp lemon juice

0.5 c polenta or cornmeal
1.5 c GF flour mix plus 0.5 c
0.5 c cornstarch
1 tsp sea salt
1 tsp xanthan gum

Combine the 1 c water, yeast, and sugar into a bowl. This step is “proofing” the yeast. Let this mixture sit until it becomes foamy, about 10 minutes.

Add the other wet ingredients and stir. Note that if you measure out the olive oil prior to the honey or molasses, and use the same measuring spoon, then the honey/molasses won't get stuck to the spoon.

Add the polenta to the wet ingredients, and stir for a minute, then let sit for five to ten minutes, to allow it to soften (Edit: if using polenta rather than cornmeal, let it sit 15-20 minutes so that it can soften better, I have found that 5 minutes isn't long enough and you end up with granules in the finished product). Add the 1.5 cups flour, cornstarch, sea salt, and xanthan gum, and mix together.

Depending on humidity or the property of flours you use, the dough may be either too wet or two dry. It will not look like normal glutenous dough at all, it should be the same consistency as thick muffin batter. If the dough is too dry or thick, add water in a tablespoon at a time. If the dough is too wet (it should not be as wet as cake batter!) then add flour a tablespoon at a time.

When the dough is the right consistency, pour it into a greased bread pan. Cover with a cloth and let the bread rise for 2 to 3 hours.

Preheat oven to 350 F.

Bake until the top is golden brown, and the insides are fully cooked, about 45-50 minutes. Remove from the pan and put onto a wire rack immediately, this prevents the crust from getting soggy.

Yields one loaf.


 Proofed yeast is foamy
 The dough will look like thick batter, and should be rather stiff.
 The dough does not smooth out during baking like glutenous bread would, so be sure to smooth out the dough with a wet spatula or a spoon.
 Smoothed-out dough
This is after the bread has risen. I made a double recipe, hence the two loaves.
 The loaf after baking. The bread doesn't "poof" like what I am used to, but that's ok.
 Bread!
You know you are a GF baker when you get really excited about air pockets.

This makes really good toast, and is pretty decent in sandwiches. It tastes good, freezes pretty well, and makes me happy. I will definitely keep tweaking this recipe, but this will continue to be my go-to bread recipe when I don't want to pay $6.50 for store GF bread.

Friday, May 13, 2011

No-knead wheat bread and strawberry-mint spread


I have been having a lot of fun being out of school, but after my first full day at home alone, I have to admit that I hope my unemployment doesn't last long. There hasn't been a single summer since I was in high school that I wasn't at a full-time job shortly after school ended. Given the economic climate since I started college, this means I have been extremely fortunate, which is not something I take lightly.

It has been nice to do relatively little these last two weeks, going on vacation and doing some housework for your parents is a far cry from the custodial work I used to do in the summers, or my awesome research job last year. But after submitting a number of applications for work and hearing back nothing for weeks is starting to get to me a little. Still, I know that I am very fortunate, and it is normal to not get a job right out of college. I am just going to have to get creative with how to spend this newfound time.
So much of the paraphernalia of school is still lying around, this stack of chemistry exams on my desk has been relegated to coaster for my tea. I should probably recycle or file those...


I have been trying to write more, and sew, between looking for jobs, and I am looking at taking summer classes, but the easiest thing to do for now is to start back up with cooking and blogging!

I found this recipe for no-knead bread this morning, and figured, "hey, I have time to make bread!"

I did tweak the recipe a little bit; first by cutting the recipe in half, then I used half white flour and half wheat flour. Finally, I didn't have cornmeal to dust the loaf with, so I chopped some rolled oats. It added some interesting texture.


The bread after rising for 3 hours.


After baking for 30 minutes.


Anyways, go over to the blog Honey & Jam to get the recipe, the bread turned out beautifully, and there was little effort involved.

But I also had some strawberries that were getting slightly wilted, and some mint leaves. So I made a strawberry-mint jam/fruit spread that was friggin' tasty, and it made a perfect accompaniment for the bread. Please note that it is not shelf-stable, and it must be kept in the refrigerator.

Strawberry-mint spread:

small bunch of mint leaves
1/2 cup water
1 cup chopped strawberries
1/4 cup white sugar
1 Tbs lemon juice

Boil the leaves in 1/2 cup of water for 4-5 minutes. Strain out the leaves, and add the strawberries, sugar, and lemon juice. After it comes to a boil, reduce heat slightly.

Mash the strawberries (I used a fork) and let the mixture boil for about 20 minutes. Let it cool, ladle into a clean jar, and then store in the fridge.


The mint flavor was not pronounced at all, but otherwise I was happy with my first-ever jam. Maybe I will teach myself canning this summer :)

Wednesday, December 29, 2010

Spiced Yam Bread


For Christmas, I made a batch of yam bread to bring to a potluck. Its a lot like pumpkin bread, but with an ingredient that is easier to find year-round. Also, I just like yams.

I came up with the original recipe some months ago, and thought it was very holiday appropriate. That particular recipe turned out a bit better then this batch did, as I wasn't very precise about scaling up the ingredients here to make two loaves instead of one big loaf.

But I am going to post the recipe anyway, because it tasted really good, even though the bread was a bit too moist, and the loaves were flat. I think it needed more flour and more baking powder.

Anyway, here is the recipe I used this time, despite it being slightly flawed. If I was going to try this particular iteration again, I would use 4 tsp baking powder, and 1.25 or 1.5 cups of each type of flour.

Wet ingredients:
3 eggs
2/3 cup brown sugar (I know that sugar isn't a "wet" ingredient, but it incorporates better at this stage)
2/3 cup granulated sugar
2 1/2 cups mashed yams
1 tsp vanilla extract
1 stick of butter, melted
1/3 cup vegetable oil

Dry ingredients:
1 cup white flour
1 cup wheat flour
1 tsp cinnamon
1/2 tsp nutmeg
1/2 tsp ginger
3 tsp baking powder
2/3 cup craisins

Start by baking halved yams in a glass pan at 375 until the yams are cooked, about 45 minutes.


Cover pan with foil and let sit for 15 to 20 minutes. This helps loosen the skin.


Remove the yam skins like so:


And mash the yams. I preferred this bread with roasted yams, as demonstrated here with sweet potatoes, but simply baking works well too.


Mix together all of the wet ingredients in a medium-sized bowl, and set aside.

Mix the dry ingredients together in a large bowl, and make a well in the center. Add the wet ingredients and mix together until just blended.

Pour into two loaf pans, and bake at 350 F until and inserted fork or toothpick comes out clean, this was about 50 minutes.

So the loaves were a bit flat as you can see.

The bread was really tasty, so despite its flaws, people enjoyed it.

Thursday, August 26, 2010

Chocolate Banana Bread


The wonderful thing about chocolate banana bread is that it seems so much more decadent than regular banana bread, but because it uses cocoa powder, not chocolate bars, it is actually better for you! Or at least I suspect it is, given the amazing properties people attach to chocolate's flavenoids and antioxidants (which help neutralize free radicals!).

I digress.

After a camping weekend where the Man and I made breakfast and many people didn't eat the fruit we served, I came back home with too many bananas, and they were turning brown. My answer to too many bananas is always: Banana bread!

No making-of photos today, but here's the recipe, adapted from here.

1 3/4 cup wheat flour (you can use white, but what makes me feel virtuous)
1/4 cup cocoa powder
1 cup white sugar
1 tsp baking powder
1/2 tsp baking soda
1 pinch salt

2 beaten eggs
1/3 cup vegetable oil
2 tablespoons melted butter
3-4 ripe bananas, mashed
1 tsp vanilla extract

Preheat oven to 350 F

In a large bowl, mix together all of the dry ingredients. Set aside.

In a medium bowl, mix together eggs, oil, butter, bananas, and vanilla. Scrape the mixture into the dry ingredients, and gently stir together. (you could add chocolate chips at this point, but why spoil the illusion that this is healthy food? Actually, it is decently healthy.)

Pour batter into a greased breadpan. Bake for 50-65 minutes, it will be done when you stick a fork or toothpick in the bread, and it comes out clean.

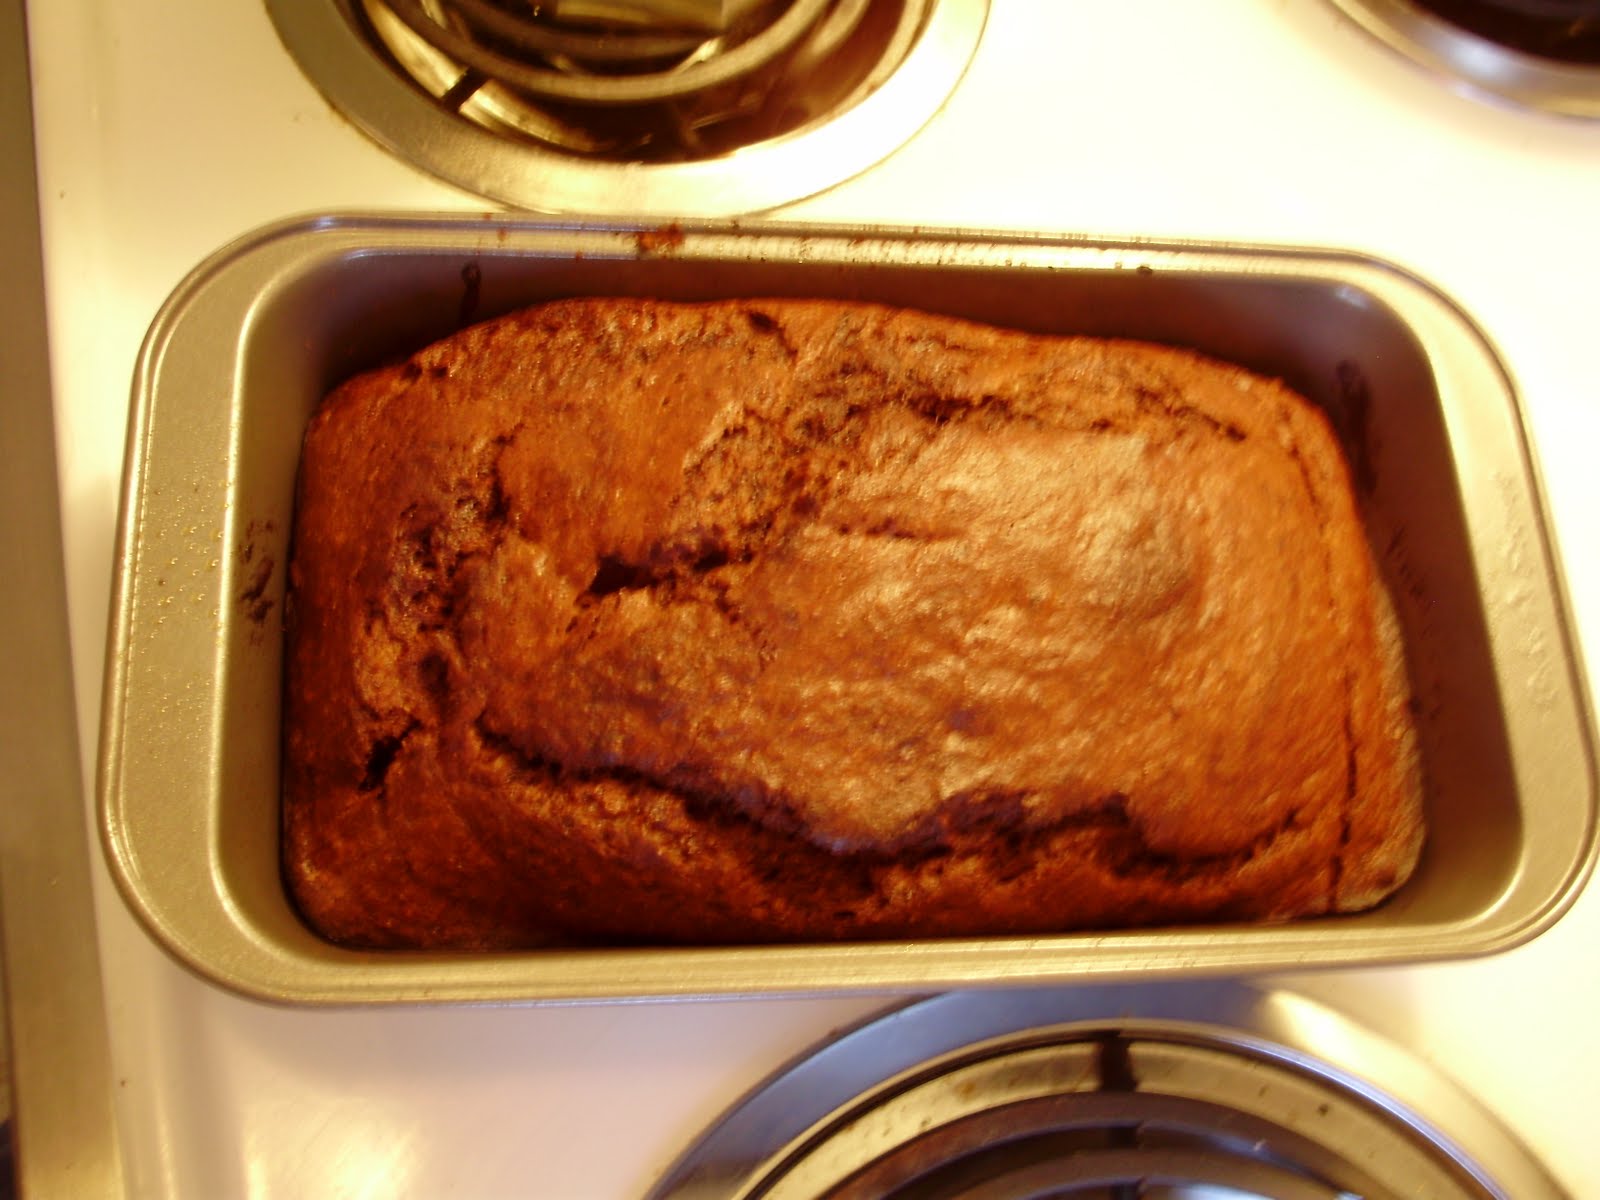
Apologies for the blurry picture.

So how was it? Definitely better the next day, but I really enjoyed this. Having more banana then the typical banana bread recipe (normally they say 2) keeps this really moist. I didn't mind the taste of the wheat flour, though the Man said he could tell there was some in the bread, but in my opinion, that is not a bad thing. The chocolate is noticeable, but not in-your-face.

A great way to use up bananas!