Showing posts with label vegan. Show all posts

Sunday, June 10, 2012

Baking Powder Biscuits, gluten-free and vegan


I have been a bit remiss in blogging. It may have something to do with the fact that we have been going places like this:

Crater Lake, which is still very snowy in June. And cold.

Or doing things like this:


Cannon Beach! You can rent a bike and drive on the beach and it is fun! Also, this was the first time I'd been on a bike in years.

...every weekend. The Man and I have been taking a somewhat whirl-wind tour of Things We Love or Have Always Wanted to Do in Oregon Before the Epic Wyoming Move. So of course that means visiting the coast and as many of the national parks as we can get to before moving day arrives.

While eating breakfast on one of these weekend trips, The Man and I both found ourselves lamenting that there isn't much in the way of gluten-free breakfasts to be had at restaurants (he can eat gluten, but often feels sad for me that I can't just order pancakes when we go out). Usually you can have some kind of omelet or potatoes at a restaurant, but we both were thinking how nice it would be to have a good GF biscuit recipe that either of us could just whip up at home.

That got me thinking about weekend breakfasts at my house growing up. My Dad would always (and still does!) make breakfast on Sunday morning. He'd get up at what seemed an early time to me (but I often get up at 5 for my job now, so seven is sleeping in. I must finally be a “real” adult.) and start making eggs and coffee. And there were almost always biscuits. It was a pretty simple recipe, half bisquick, half whole-wheat flour, and all of the add-ins that the bisquick box said to do. I have fond memories of being eight or so, and learning how to shape the biscuits. We don't cut and roll biscuits in my family of origin, you take a wad of dough, roll it into a ball, and stick it on the cookie sheet. They were very, very tasty. In eighth grade, I started making baking powder biscuits from scratch so often that I had the recipe memorized for a while.

Biscuit dough is so simple, surely it must be easy to make gluten-free, I thought. So I took a look in an Amish cookbook I have, and made a couple ingredient swaps to take out dairy and gluten. The result? Tasty, fluffy biscuits that the Man and I happily ate for lunch. They don't quite taste as whole-grain as the biscuits my Dad makes, nor as light as the white-flour ones I used to make, but they are a happy compromise, without the gluten and dairy.

Baking Powder Biscuits
Adapted from “From Amish and Mennonite Kitchens,” by Phyllis Pellman Good and Rachel Thomas Pellman

1 cup coconut or alternate milk of choice
2 tsp lemon juice
2 cups gluten-free flour mix*
2 tsp baking powder
½ tsp xanthan gum
¼ tsp sea salt
3 Tbs Shortening (I used Spectrum)


Preheat oven to 450. Combine the milk with the lemon juice, and set aside for at least five minutes**. Meanwhile, whisk together the dry ingredients. This helps make sure the ingredients are evenly distributed. Add the shortening, and blend with a fork or pastry blender until the mixture becomes fine (1/3 inch or less) crumbs. Add the milk-lemon juice mixture about a quarter cup at a time, stirring the dough after each addition. The dough should be slightly wet, so that it clumps together, but not as wet as muffin batter.

Take about 2 tablespoon of dough at a time, roll into a ball with your hands, and press onto a cookie sheet. Flatten the ball slightly. Do this until you have used up all of the dough. Alternatively, roll out the dough to ½ inch and cut biscuits out.

Bake for 10 to 12 minutes, until lightly browned. Makes about 10 biscuits.

Yaaaaay!


They were a little more crumbly then normal wheat biscuits, but still held up well to normal toppings like jam.

Incidentally, it has been just over one year since I got my gluten-intolerant diagnosis. I thought about doing some kind of big dramatic blog about it, but I haven't the extra time between my job and getting ready to move. I just wanted to make a note of it, and encourage any people who are newly gluten-free. The adjustment does suck a lot at the beginning, but after a year of this diet, I feel so much better, and it is pretty easy and natural to cook for myself. Hurrah for better health!


* My current favorite flour mix is 2 parts sorghum flour : 1 part millet flour : 1 part brown rice. I keep it in a big container. I think this would work well with part oat, or quinoa, or oat flour, but to make biscuits exactly like these, use 1 cup sorghum, ½ cup millet, and ½ cup brown rice flours.

** Adding lemon juice to milk (either an alternate milk or a dairy milk) makes a sort of cheaters buttermilk. Do this anytime you need a non-dairy buttermilk in a recipe, or if you can have dairy, but don't feel like running to the store just for buttermilk.


Sunday, January 29, 2012

Delicious Chocolate and Blood Orange Cupcakes

(Which I was going to call “Gluten-free vegan chocolate cupcakes with a customization option which I made with blood oranges” but I realized that this was a rather long-winded way of titling something which, quite simply, was delicious).


These pictures are not the greatest; I was in a hurry to finish baking before a meeting.

A lot of people in my life have food allergies/intolerances now, and so it is pretty common to have long email threads before a gathering to see who can eat what, and what people should bring that everyone can eat. This is very confusing for folks who do not live with these dietary issues, particularly when it comes to baking. So, usually I am asked to handle the desert. Which I am happy to do!

Most recently, we needed to accommodate egg, dairy, and gluten issues, so the brownies that I normally make were out. I had made these mocha cupcakes before, and they were delicious, but there were young kids at the gathering, and I didn't think their parents would appreciate a caffeine-laden desert. But I liked the idea of cupcakes (according to The Internet, cupcakes are a culinary trend that is becoming unfashionable) (I think that is ridiculous, cupcakes have always been a mainstay of birthday parties and gatherings where a layer cake is impractical) (plus they are super-kid friendly and seem to make a bit less of a mess) (good heavens this is a lot of parentheticals) so I tweaked the already-fabulous recipe into something that would work for me.

And thus we have this recipe for a plain chocolate cupcake, which is also vegan and gluten-free.

Chocolate cupcakes

Adapted from the Gluten-Free Goddess

Dry ingredients

¾ cup sorghum or brown rice flour
¾ cup cornstarch
½ cup cocoa powder
1 cup granulated sugar
½ rounded tsp sea salt
1 tsp baking soda
1 tsp baking powder
1 tsp xanthan gum

Other ingredients
2 Tbs ground flax seed + 4 Tbs warm water (you can use 2 eggs instead if you prefer)
1 cup non-dairy milk of choice
3 Tbs light-tasting oil
½ tsp vinegar
1 tsp vanilla extract

Preheat oven to 350 F.

Combine the flax with the warm water in a small bowl, and set aside, allowing it to sit for at least five minutes. This is your “egg.”

Combine the dry ingredients in a medium sized bowl, and whisk together to incorporate.

Add in the other ingredients, including the flax “egg,” and mix for 2-3 minutes. This can be done in a stand mixer or with a regular spoon or whisk if you don't mind a work-out. The batter will be very thick, and somewhat stringy.

Fill muffin tins (lined with cupcake liners) about 2/3 full of batter. It may be necessary to smooth out the tops of each tin of batter with the back of a spoon in order to get a smooth top after baking.

Bake cupcakes for 20 minutes.

Makes 1 dozen cupcakes.

Remove from the tin to a wire rack to cool, or else the cupcakes become slightly soggy.

Wait until the cupcakes have completely cooled prior to frosting.

Frosting:

2 cups powdered sugar
2-4 Tbs shortening (I used Spectrum)
¼ cup cocoa powder
1 tsp vanilla extract
2-3 Tbs non-dairy milk

Combine the first four ingredients, then add “milk” one tablespoon at a time. Blend with a stand or hand mixer until fluffy. Add more liquid if necessary. Pipe or spread onto cooled cupcakes.

Unfrosted chocolate cupcakes. Gluten-free baked goods are often a little lumpy if you don't smooth out the batter.

Variation:

After making these, I decided to try to make another variety. I suspect you could make infinite variations to this recipe if you so desired. Basically, you change what spices or extracts you add to the batter, replace cocoa powder with cornstarch if the cupcake is non-chocolate, and use different liquids for the “milk.” I made a blood orange cupcake, and it was fantastic. I used these ingredients, following the instructions above. Please experiment with making your own changes to the recipe, until you find something that you really like! The recipe seems to be pretty forgiving.

Blood orange cupcake variation

Dry ingredients

¾ cup sorghum flour
1 ¼ cup cornstarch
1 cup sugar
½ rounded tsp sea salt
1 tsp baking soda
1 tsp baking powder
1 tsp xanthan gum
half the zest of a blood orange
½ tsp nutmeg

2 Tbs flax + 4 Tbs warm water
3 Tbs oil
½ cup blood orange juice
½ cup coconut milk
2 tsp lemon juice

Frosting:

2 cups powdered sugar
2-4 Tbs shortening
half the zest of a blood orange
~2 Tbs blood orange juice


Unfrosted cupcakes. These were pretty tasty plain.

Pretty pink frosting.


So try either variation, or play with the ingredients and make your own! Cupcakes should be fun as well as tasty.


Sunday, December 18, 2011

Ruby Cakes Review

Dear readers who don't live in Oregon: feel free to skip this post, as it is about a local business.


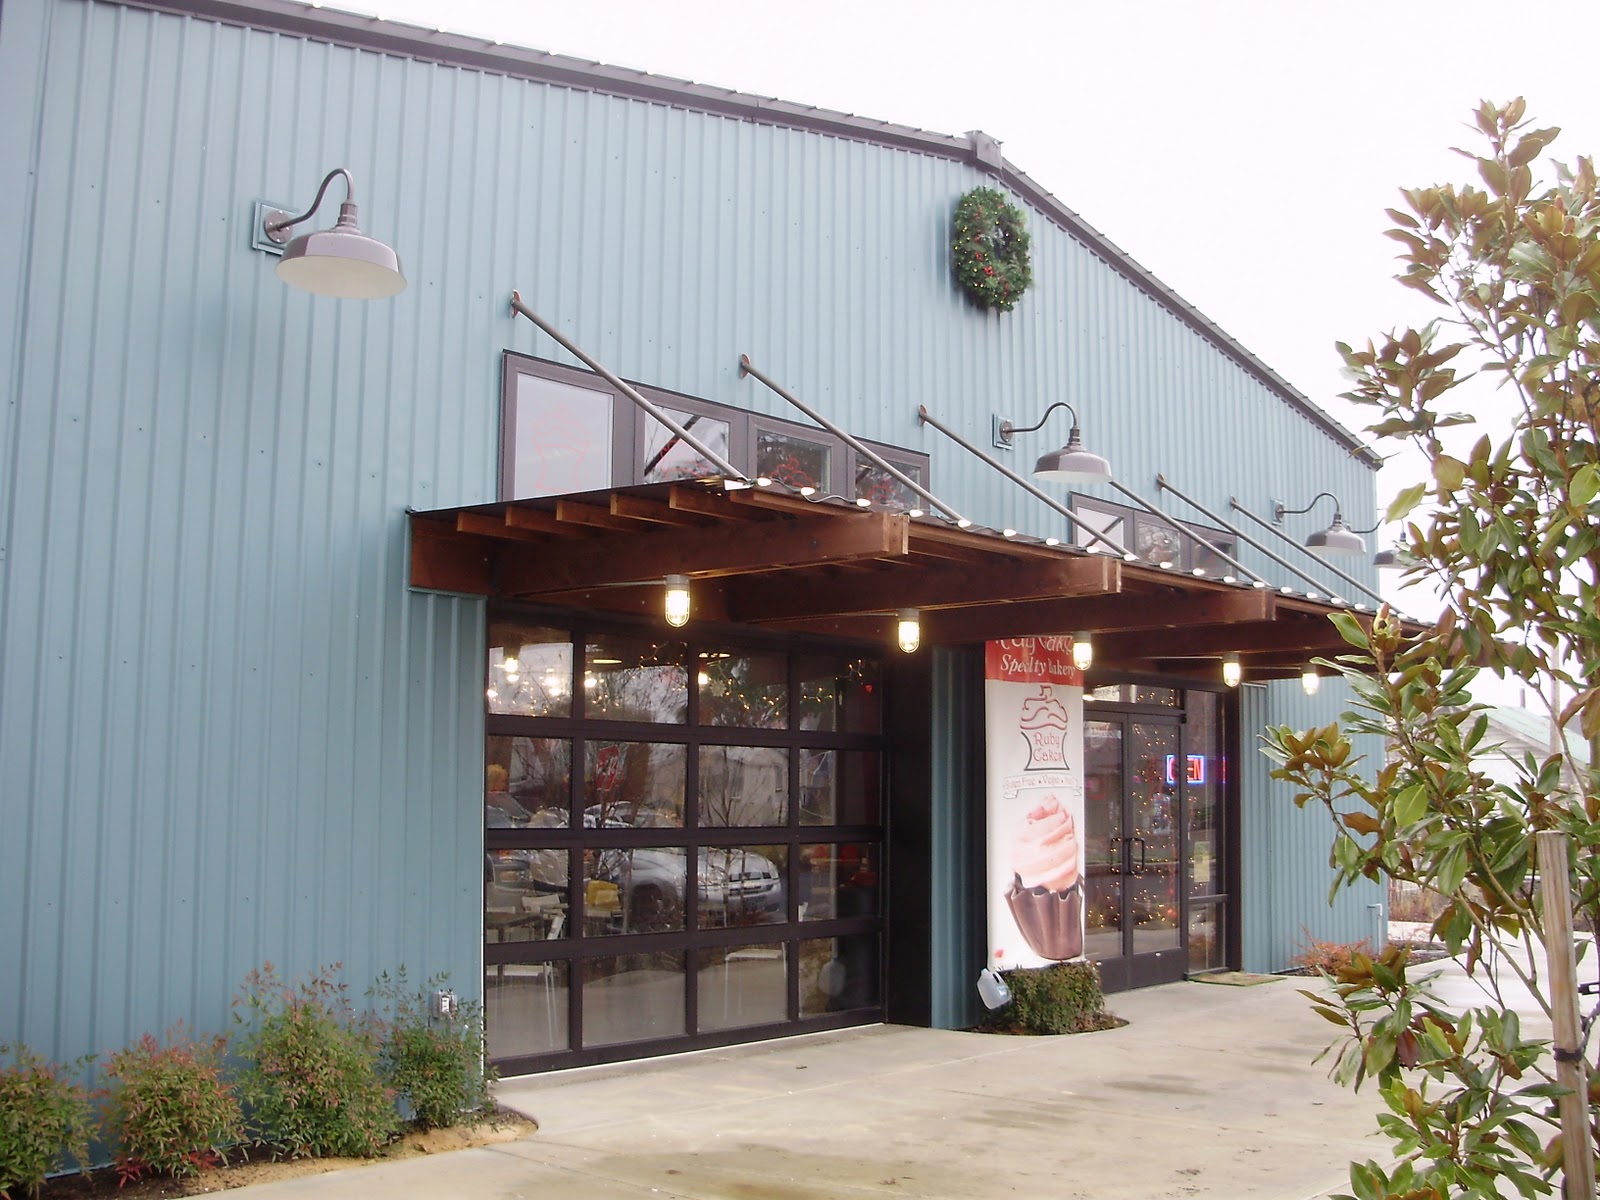
This weekend, The Man and I tried out a new bakery in the area. That sounds a bit mundane, until it is pointed out that the bakery mentioned is a dedicated gluten-free, nut-free, vegan place. “Wait, so I can eat every single thing?” was my reaction when I first heard that this place was opening.

Ruby Cakes in McMinnville was a fantastic experience. They had quite a variety of baked goods, and each thing that we tried was amazing. Moreover, there was something wonderful about knowing that the treats were perfectly safe for my food intolerances, as well as many other people in my life. The staff were friendly and knowledgeable, and genuinely interested in providing the community with allergen-free treats. I was also pleased that the prices were quite reasonable; comparable to what I have paid for things at glutenous bakeries.


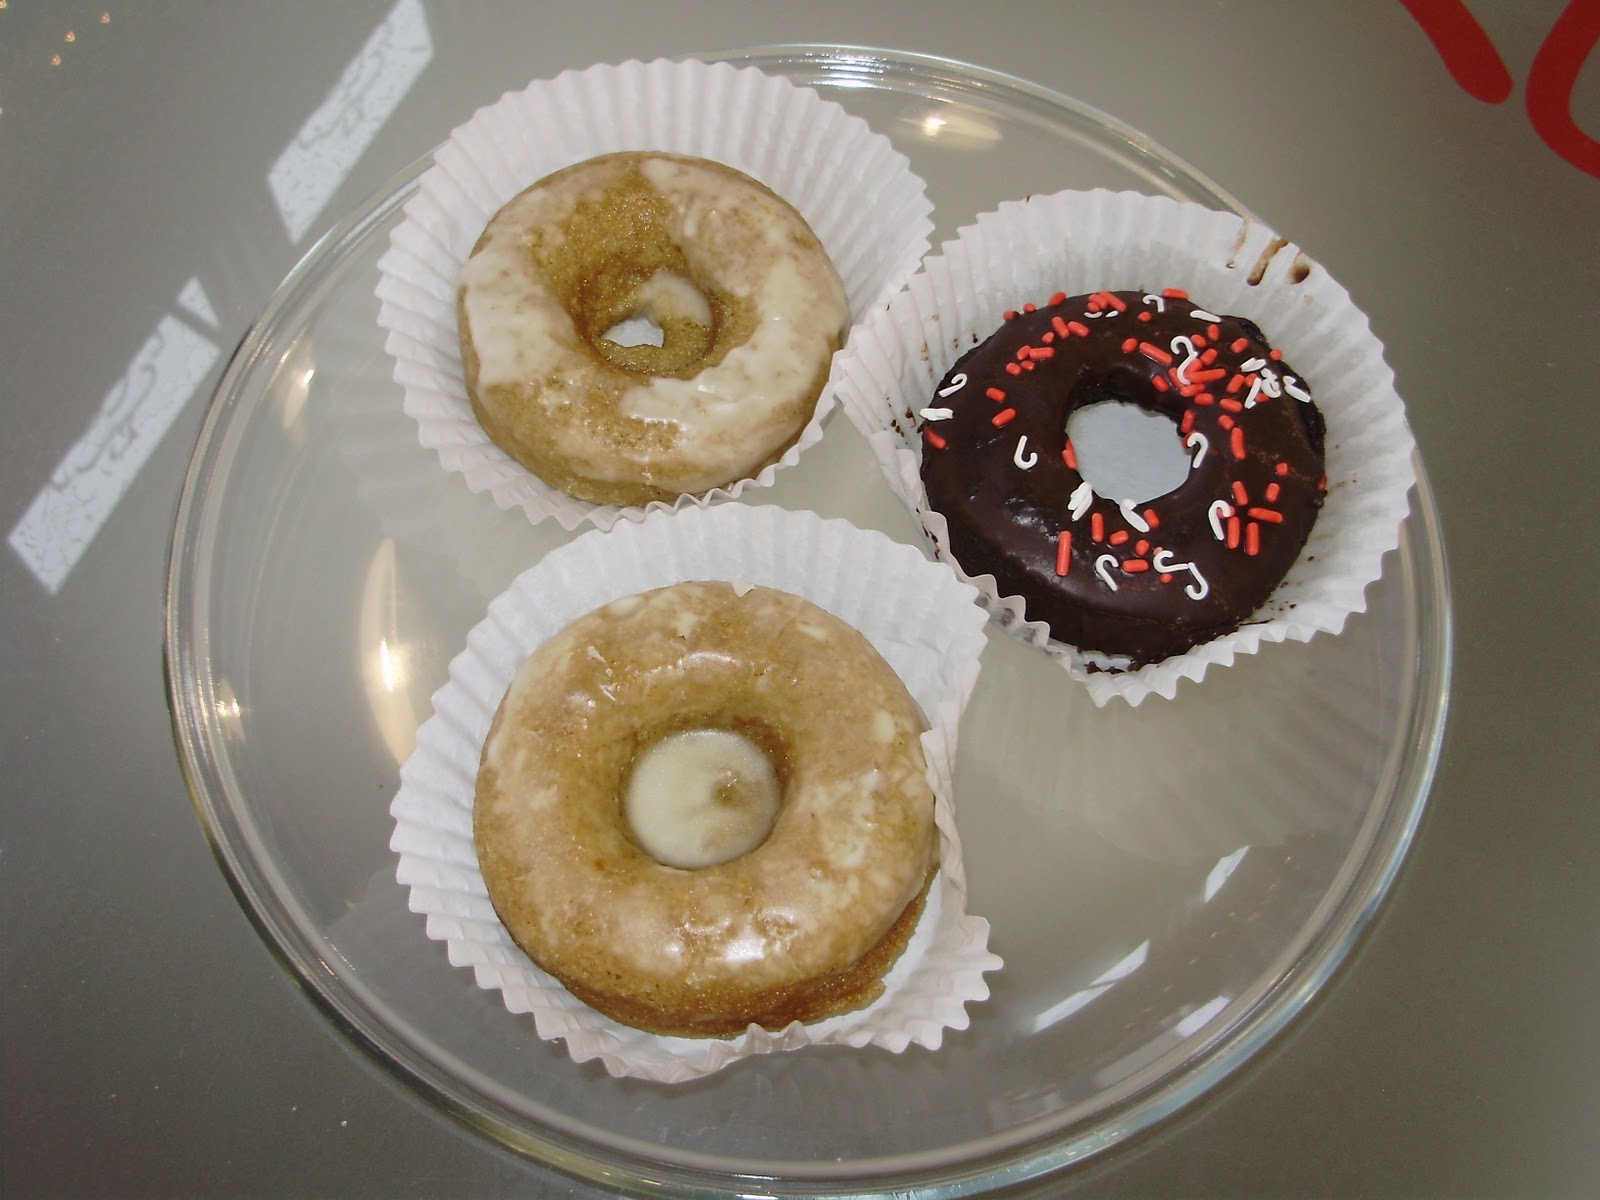
 These little doughnuts were delicious.

This cinnamon roll was huge; I split it with The Man. I never expected to be eating a cream-cheese frosted cinnamon roll again, and I could not tell that it was vegan or GF! Saturdays are cinnamon roll day at the bakery.

There were 8 kinds of "milk" for the coffee, only two of which contained any dairy. This was fantastic!

I am very happy that this business has opened, and I will most assuredly be visiting again in the near future. If you live near McMinnville you should try this place, even if you don't have any allergies.  


Saturday, November 19, 2011

Quinoa Tabouli


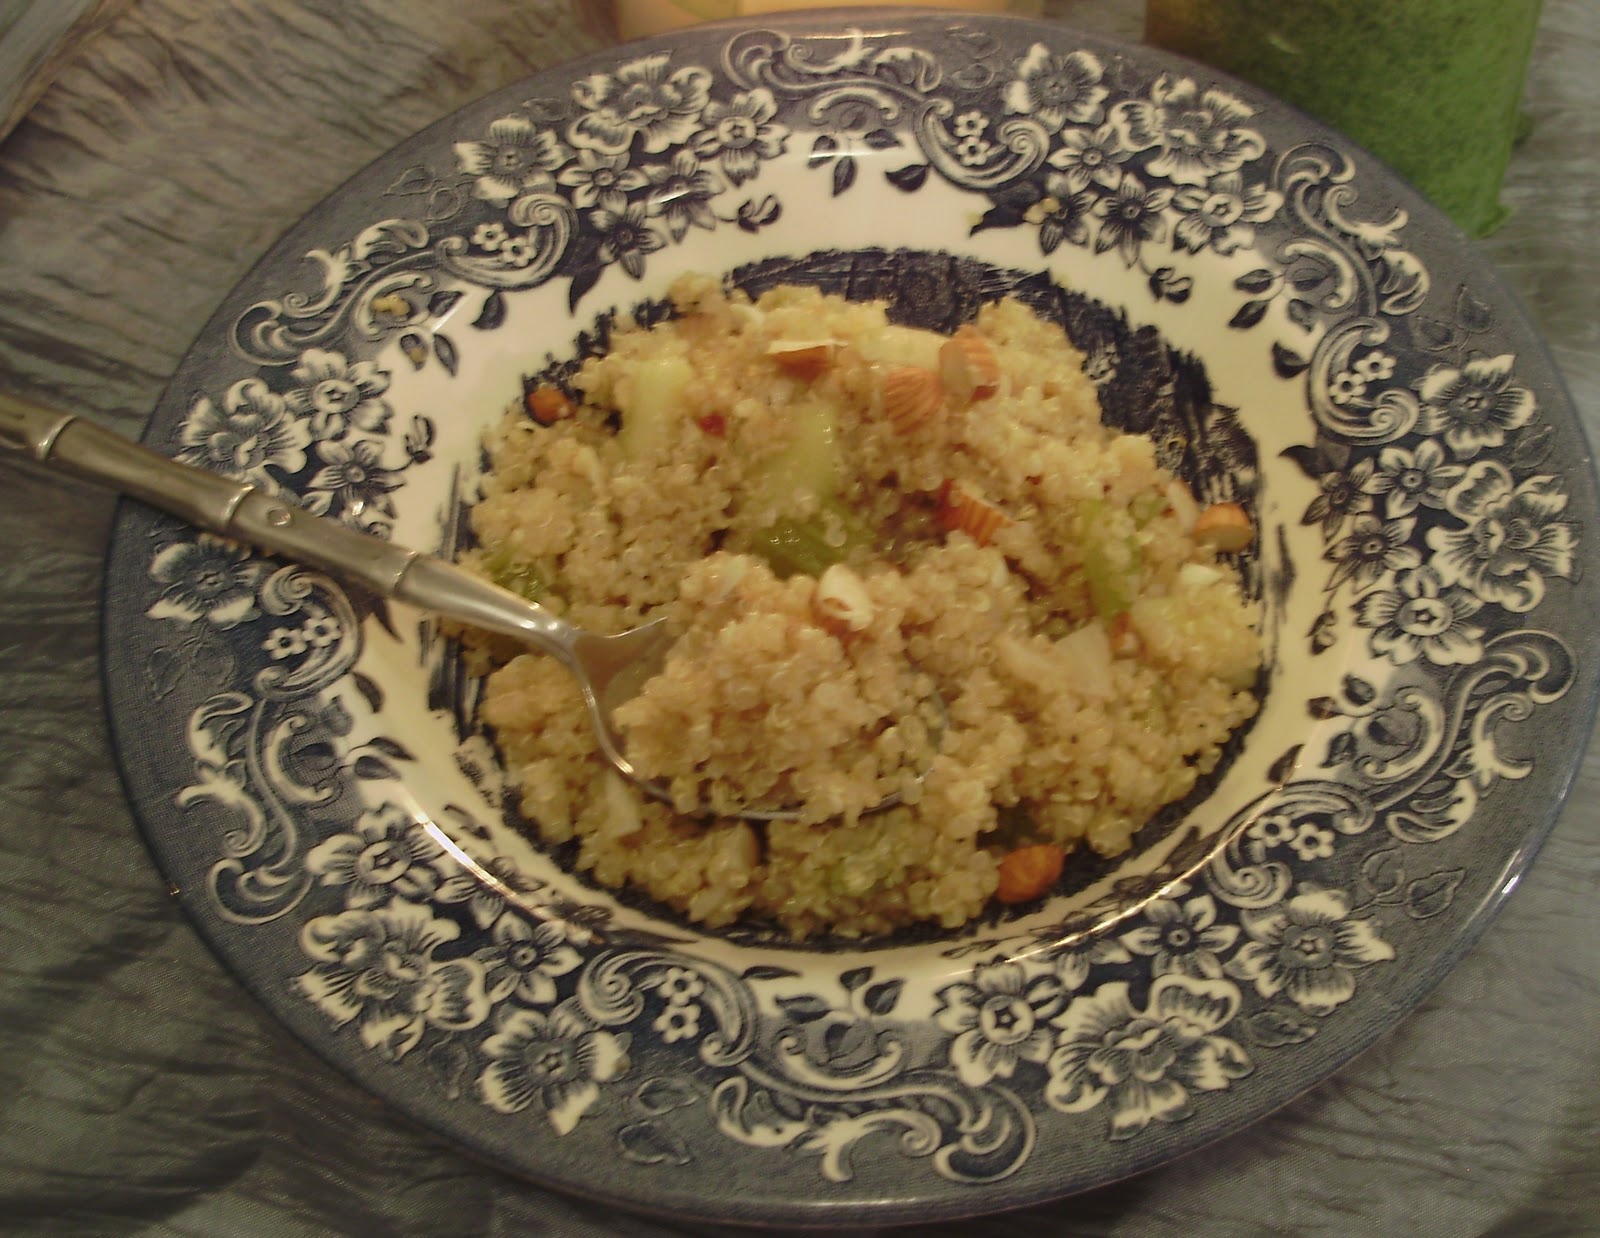
Here is a dish which can be the main part of a meal or a side dish, and it is friendly to most of the special diets. It is gluten-free, dairy-free, sugar-free, vegan, can be made nut-free by skipping the garnish, and it has lots of vegetables. Basically, it is awesome. And good for you.

Quinoa Tabouli 

Adapted from this recipe

1 cup quinoa
2 cups water or broth
1/2 of a yellow onion, diced
1-2 cloves garlic, minced
1 stalk of celery, diced
1 half of a cucumber, peeled, seeded, and chopped
1/4 cup lemon juice
3 Tbs olive oil
1 1/2 tsp Italian seasoning
1 1/2 tsp dried oregano or basil
salt and pepper to taste

chopped almonds to garnish, if desired

Rinse the quinoa in a sieve for a minute. This gets rid of the bitter taste from the quinoa. Put the quinoa and water or broth in a pan, and bring to a boil. Reduce heat and cook until the quinoa is done, about twenty minutes. 

Meanwhile, chop and peel vegetables as required. If you do not like the flavor of raw onion, sautee it in olive oil over medium heat for ~5 minutes, I did. 

When the quinoa is done, mix in the vegetables, oil, lemon juice and spices. Garnish with nuts if you so desire.

Serves four.

If I'd had fresh mint or basil and tomatoes I totally would have added them! It is good warm or cold. 


Wednesday, October 19, 2011

Curried Pumpkin Soup

A wonderful, seasonal soup.

I love pumpkin-flavored everything. Normally this time of year, I would be getting pumpkin-spice lattes, pumpkin bread and muffins, and anything else pumpkin-flavored at the store or coffee-shop.

But this is my first fall with food allergies. And neither the bread nor the lattes are necessarily safe for me to have. Last month, I drank a soy pumpkin-spiced chai tea that made me sick for a couple days. I was told later that chai sometimes has gluten in it. Today I went up to the counter at Starbucks and asked if there was gluten in their pumpkin spice flavor. Thankfully, the barista knew that there was, so I did not order that. My fall is not ruined by the lack of pumpkin spice, however!

I made a big batch of pumpkin puree (following this tutorial) and with it I have been making my own pumpkin baked goods. The best thing I've made so far, though, is curried pumpkin soup. It is delicious, filling, and just happens to be gluten free and vegan (unless you use chicken broth). It has just the right touch of coconut and curry flavors. My squash-ambivalent spouse liked it a lot, too. I consider that a success!


Curried Pumpkin Soup

2 Tbs olive oil
3-4 peeled garlic cloves
1 medium carrot
1 medium yellow onion
2 cups broth or water (chicken is good, use vegetable to make it vegan)
1 pound pumpkin puree (a 15-ounce can of puree is fine)
½ can of coconut milk
1 ½ tsp curry powder
½ tsp salt
½ tsp black pepper
a sprinkle each of nutmeg and cinnamon

Heat the olive oil at medium in a saucepan. Roughly chop the garlic, and saute in the oil for about three minutes. 
Briefly saute the garlic

Give the onion and carrot a rough chop, and add them to the saucepan. 

Carrots and onions

Stir the vegetables for about a minute, then add the broth (or water) to the pan. Bring it to a boil on high heat, then reduce heat to medium. Simmer the broth for 20-30 minutes, until the onion and carrot are soft.

Turn off the heat, and let the pan cool at least five minutes. Add the vegetables and broth to a blender, but avoid filling the blender more than half full. You may need to do this in batches. If you are using homemade pumpkin puree and you have not previously run it through a food processor, add it to the blender too. Blend the contents until the soup is as smooth as you prefer.

This was probably a little too full, as I have heard that blending hot food can cause explosions if the blender if full. That is one reason to let the soup cool a bit.

Pour the blender contents back into the saucepan. If you have a compulsion not to waste the food on the sides of cans, blenders, etc. like I do, swish a little bit of water around the blender to help remove the pureed vegetables and pour it into the saucepan.

Add the coconut milk and spices to the saucepan. Heat over medium for 10-15 minutes to allow the flavors to mingle. You may want to add a little bit of water to the soup if it is too thick at this point.

Mixing in the coconut milk. You can use lite coconut milk if you are worried about calories.


 I had to add probably a half cup of water to make it my desired consistency.


It is a delicious soup. Make it now!

Sunday, July 31, 2011

Gluten-free vegan chocolate chip cookies


Food intolerances are a pain in the ass.

There, I said it.

Since my last post, my full food allergies/intolerance tests came back, and the list is a lot longer than gluten. Dairy is no longer allowed. The exception, for now, is butter. My doctor says it is ok because it is 99% fat, and most of my issues are with the proteins and sugars in milk. But there is a chance that I am so sensitive to it that I may need to cut that out of my diet as well. I have hopes that I will be allowed small amounts of dairy after it has been eliminated from my diet for a while, but there is no guarantee of that.

I also am not supposed to have asparagus, amaranth, pineapple, or bananas, as my body makes antibodies against them. No amaranth is fine by me, as most GF products don't use it. No asparagus is also fine, as I do not like how it tastes. I am sad about the bananas; they are convenient breakfast food and I love banana bread. However for reasons highlighted in this article, I had already been limiting my consumption of them. I am sad about pineapple, but we didn't eat it that often anyway, as we try to eat our produce in season.

I am able to look on the bright side about a lot of these new food intolerances, but I will be honest with my readers and say that I am taking the no-dairy pretty hard. Unlike traditional glutenous products like bread, there is no good substitute for cheese. True, there are some almond and soy products that look fairly promising, but I just ate some decent almond “cheddar” with my lunch that, after looking at the packaging, turns out contains casein. Casein is one of the proteins in milk, and it is bad for me. There is so much more potential for cross contamination now, and a product that says “non-dairy” or “lactose-free” is not neccesarily dairy-free.

About half of the times I have gone out to eat in the last few months (which is increasingly difficult) I have had to send back my order because there is cheese or bread crumbs on it, when I asked for no cheese, or said “no gluten”. Which, look, I used to work in food service and I know that it can be hard to keep track of customizations to orders, but this is literally playing with my life. I have had to miss several days of work due to accidental cross-contamination now. Also, many people were sympathetic with me about going gluten-free, but suddenly when you add “dairy-free” to that list, a number of people reacted drastically. “I could never do that!” or “I would miss cheese/bread/bananas (etc) too much” or my personal favorite “well what CAN you eat?” I know that people generally aren't well educated about allergies/intolerances until they have to deal with it themselves (and I am guilty of this as well) but I just feel so different from people now. I hate that when I go out to eat in groups, we have to eat in places that won't make me sick; that I have to change the group agenda.

Well, that was a longer rant then I expected.

There is a lot to be happy about, though. First off, why wouldn't I be glad to stop eating the things that were making me sick? I do have more energy now, there is no way I could have worked an 8 hour day even a few months ago. The Man and I still have now idea how I was able to finish school when I had maybe four hours of energy on a good day. And there are a lot of places that make GF and DF foods now. I live in an area that is actually very good about trying to accommodate dietary needs. Also, there is still so much food that I can eat, and I try to do so happily. And, I can make my own baked goods when I am sad that there is something I can't have.

On the subject of making my own baked goods, I made some cookies! At my internship, I am due to make a presentation soon. In the lab I am working in, people always bring snacks to the meeting when they are speaking. Most people bring cookies, usually storebought. Well, I don't want to buy something I can't eat, nor do I want to spend the money on one of the brands that I can (GF baked goods are 2-3 times the cost of glutenous baked goods). And sometimes you just want to eat homemade cookies! So here is a recipe I am am experimenting with, that I hope people will enjoy.

This is adapted from Roben Ryberg's book “You Won't Believe It's Gluten-Free!”

I went ahead and made this recipe vegan too, in order to accommodate more dietary needs.

Some of the ingredients are measured in grams. This is because it is much more precise, and very useful in gluten-free cooking. This post explains why.

Also, please make sure that all of your products are gluten-free before you buy them. I have had a lot of unpleasant surprises when I neglected to read labels even on things that should be GF, such as vanilla. Bob's Red Mill has a great line of GF flours, Thai Kitchen makes GF products, and there are several brands of baking powder and cornstarch that clearly list “gluten-free” on their packaging.

Gluten-Free Vegan Chocolate Chip Cookies

1 Tbs ground flax seed
2 Tbs nearly-boiling water
¾ cup coconut solids*
¼ cup coconut water *
115 grams (1/2 cup packed) brown sugar
80 grams (2/3 cup)cornstarch
50 grams (1/3 cup)GF flour mix**
1 ½ tsp baking powder
¼ tsp salt
1 ½ tsp vanilla
1 ¼ xanthan gum
1 cup of chocolate chips

Make a “flax egg” in a large bowl by whisking the water with the flax seed until it forms a paste. Let stand for 5 minutes.

Add the coconut solids and water, and the sugar to the same bowl. Cream together until smooth.


Add the other ingredients, except for the chocolate chips, and mix together. Add the chocolate chips.

You can see how sticky the dough is.

Optional: Leave dough in the refrigerator for 1-3 hours. This allows the liquid to absorb into the flours better, and makes the dough easier to handle.

Preheat oven to 375. Scoop 1-2 Tbs of dough with a spoon onto a cookie sheet lined with parchment paper or a silpat (if you have neither, then grease the cookie sheet very well). Because these do not spread out when baking as normal dough would, flatten the balls to ¼ inch thick. This is easiest when done with a spatula that has been sprayed with cooking spray.

Bake for 8-12 minutes, depending on how crisp you like your cookies.


So how were these? I enjoyed them quite a bit, but they aren't quite right yet. They are very soft and fluffy, almost like a little pancake! This was improved by baking for 11 minutes instead of nine, and by flattening the cookies more. The flax made them taste a bit more “whole grain” then I wanted in my dessert (normally I love whole grain!) Also they could be a little sweeter. Next time, I will probably use butter or margarine and an egg instead of coconut milk and flax seed. However, they are very good if you want a soft, gluten-free, vegan cookie.

Edit to add: these had a much more cookie-like texture the next day.

* I put a can of coconut milk in the fridge, which allowed the solids to float to the top, and the coconut water to settle. I suspect that pouring a cup of coconut milk straight in this recipe would not work, as the extra fat is needed to replace the butter.

** I made up a master mix of all-purpose GF flour from white and brown-rice flour, teff, almond meal, oat flour, and sorghum. I love it for most of my baking. There are articles on how to come up with your own mix here and here.

Monday, November 1, 2010

Butternut Squash soup


I have been absent for about two months. I am sorry, and I don't have a good excuse besides that it is my senior year of college and I am a biology major. Or maybe that is a good excuse. Hmm.

Anyway, butternut squash soup! It is made of win. And squash.

You know it is November when you are filling out your ballot and making this soup (not at the same time).

I adapted this recipe from the crockpot lady, mostly because I had to make dinner between two classes today, and didn't have time to use a crockpot. But she is fabulous and you should read her blog if you own a crockpot, or even if you don't.

Obtain a butternut squash, cut it lengthwise (this is difficult, you;ll need a hefty knife) and put it in a roasting pan in a 375 degree oven for 35 minutes, or until the flesh is soft.

Meanwhile, cut up two apples (fuji or something similar is best, I used granny smith and the soup was a bit too tart for me) and a medium onion into 1 inch pieces (no need to be precise).

Let the squash cool until you can handle it safely (I did not, hence the potholder. Don't be impatient like me.) Then scoop out the flesh.


Put the onion, apple, and squash into a stockpot and and 32 ounces of broth (chicken or vegetable) in the pot. Season with 1/2 tsp pepper, a pinch of salt, and a sprinkle of nutmeg. Bring the pot to a boil, then turn down heat and simmer the covered pot for 25 minutes.

Let the soup cool slightly, and then blend in small batches until the soup is as pureed as you like it. Reheat if necessary, then serve.

This is Free_the_Radicals attempt at fancy food photography. Though the sprinkle of nutmeg and drizzle of olive oil is delicious.

This was quite tasty, though a bit too tart. I think next time I will either use one apple, or two small fuji's. But still good!