Monday, October 31, 2011

Spiced Cider

Cider is awesome. Spiced cider, doubly so.

 As you are doubtless already aware, today is Halloween. I don't typically do a lot to celebrate Halloween, though I do enjoy the excuse to dress up and eat too much candy. We already attended our party that involved costumes for this Halloween season, though, and we don't get many trick-or-treaters at our place. Like, I think there were two last year.

But because I didn't have to go to work today, I was inspired to celebrate the holiday just a little. I had a pumpkin in the house, so on a whim I carved it! I haven't carved a pumpkin since I was eight.

And in a little while, I am going to make and consume spiced cider. You should too, as a little celebration. Or just because it is good.


I am planning on doing NaNoWriMo this year, and my book is set in Space. It inspired this Space-themed pumpkin.

This isn't a recipe so much as a method to make yourself some spiced cider. It is so good!

First, get some good apple cider. I am lucky that I have some farm-fresh apple cider, but there are some organic store brands that are good, too. Normally I am not a stickler for organic anything, but the less processed (in this case), the better.

Add 2 and a half cups of cider, a cinnamon stick, a teaspoon of lemon juice, a few cloves, and some freshly grated nutmeg to a saucepan. Bring to a boil, watching carefully! The cider will boil over in a matter of seconds, and make a mess. Reduce heat and simmer for ten minutes.

Serves two.
 Add the spices
 Briefly bring to a boil. After simmering for ten minutes, it is done!

Wednesday, October 19, 2011

Curried Pumpkin Soup

A wonderful, seasonal soup.

I love pumpkin-flavored everything. Normally this time of year, I would be getting pumpkin-spice lattes, pumpkin bread and muffins, and anything else pumpkin-flavored at the store or coffee-shop.

But this is my first fall with food allergies. And neither the bread nor the lattes are necessarily safe for me to have. Last month, I drank a soy pumpkin-spiced chai tea that made me sick for a couple days. I was told later that chai sometimes has gluten in it. Today I went up to the counter at Starbucks and asked if there was gluten in their pumpkin spice flavor. Thankfully, the barista knew that there was, so I did not order that. My fall is not ruined by the lack of pumpkin spice, however!

I made a big batch of pumpkin puree (following this tutorial) and with it I have been making my own pumpkin baked goods. The best thing I've made so far, though, is curried pumpkin soup. It is delicious, filling, and just happens to be gluten free and vegan (unless you use chicken broth). It has just the right touch of coconut and curry flavors. My squash-ambivalent spouse liked it a lot, too. I consider that a success!


Curried Pumpkin Soup

2 Tbs olive oil
3-4 peeled garlic cloves
1 medium carrot
1 medium yellow onion
2 cups broth or water (chicken is good, use vegetable to make it vegan)
1 pound pumpkin puree (a 15-ounce can of puree is fine)
½ can of coconut milk
1 ½ tsp curry powder
½ tsp salt
½ tsp black pepper
a sprinkle each of nutmeg and cinnamon

Heat the olive oil at medium in a saucepan. Roughly chop the garlic, and saute in the oil for about three minutes. 
Briefly saute the garlic

Give the onion and carrot a rough chop, and add them to the saucepan. 

Carrots and onions

Stir the vegetables for about a minute, then add the broth (or water) to the pan. Bring it to a boil on high heat, then reduce heat to medium. Simmer the broth for 20-30 minutes, until the onion and carrot are soft.

Turn off the heat, and let the pan cool at least five minutes. Add the vegetables and broth to a blender, but avoid filling the blender more than half full. You may need to do this in batches. If you are using homemade pumpkin puree and you have not previously run it through a food processor, add it to the blender too. Blend the contents until the soup is as smooth as you prefer.

This was probably a little too full, as I have heard that blending hot food can cause explosions if the blender if full. That is one reason to let the soup cool a bit.

Pour the blender contents back into the saucepan. If you have a compulsion not to waste the food on the sides of cans, blenders, etc. like I do, swish a little bit of water around the blender to help remove the pureed vegetables and pour it into the saucepan.

Add the coconut milk and spices to the saucepan. Heat over medium for 10-15 minutes to allow the flavors to mingle. You may want to add a little bit of water to the soup if it is too thick at this point.

Mixing in the coconut milk. You can use lite coconut milk if you are worried about calories.


 I had to add probably a half cup of water to make it my desired consistency.


It is a delicious soup. Make it now!

Thursday, October 6, 2011

Winter Squash Muffins (gluten-free)

-->
Even though I'm sad that the nice weather seems to have gone, I am pretty excited for fall. Autumn in the Pacific Northwest is generally a cold and rainy season, and soon enough, we will be dealing with 34 degree rain. So I am not particularly looking forward to rainy fall weather. No, I am mostly looking forward to the food. As much as I am going to miss summer produce, I love squash and root vegetables! The Man and I walked past a big display of squash a couple of days ago, and I had to buy one, even though I had no idea how I was going to cook it.

I supposed the easiest answer for most squash is to turn it into soup, or cut it in half and bake it for dinner. But I didn't really feel like doing that. We aren't quite far enough into autumn for squash dinners at our house yet. Probably the most famous of the winter squash is pumpkin, and any baked good with pumpkin is one of my favorite things. Therefore, I decided to make squash muffins! It certainly isn't the weirdest baked good I have made (Guinness cupcakes and yam bread for instance. Warning: those are not gluten-free).

These muffins tasted pretty dang good, and had a nice flavor that reminds me of Thanksgiving, or Halloween. Use any squash you like the flavor of, pumpkin and butternut would be great. As always, make sure all ingredients are gluten-free, and free of any potential allergens (dairy, soy, etc.) for you or those you are cooking for!

Adapted from this recipe.


-->
Winter Squash Muffins

Dry ingredients
1 ¼ cup GF flour mix*
½ cup almond meal
½ tsp xanthan gum
½ tsp salt
1 ½ tsp baking soda **

Other ingredients:

1 ½ cups of squash puree (12 oz or 340 grams. Canned pumpkin puree would be fine)
1 stick (½ cup) of softened butter or vegan margarine (½ cup of vegetable oil would also work)
¾ cup brown sugar
¼ cup molasses (spray the measuring cup with oil first if you don't want a big mess)
1/3 cup nondairy milk (almond or coconut are awesome)
2 eggs
1 tsp cinnamon
½ tsp nutmeg
½ tsp ginger
1 tsp vanilla

*I used a 2:1:1 mix of sorghum, millet, and quinoa, respectively. Use the flours you like!

** I actually used just one teaspoon of baking soda, but these muffins were flatter then I would have liked. I think increasing the soda to 1 ½ tsp would fix this.

There is a nice guide to making pumpkin puree here that would work for any winter squash. I don't have a food processor, so here is how I made mine!


I used a Red Kuri Squash/Hokkaido Pumpkin.
-->
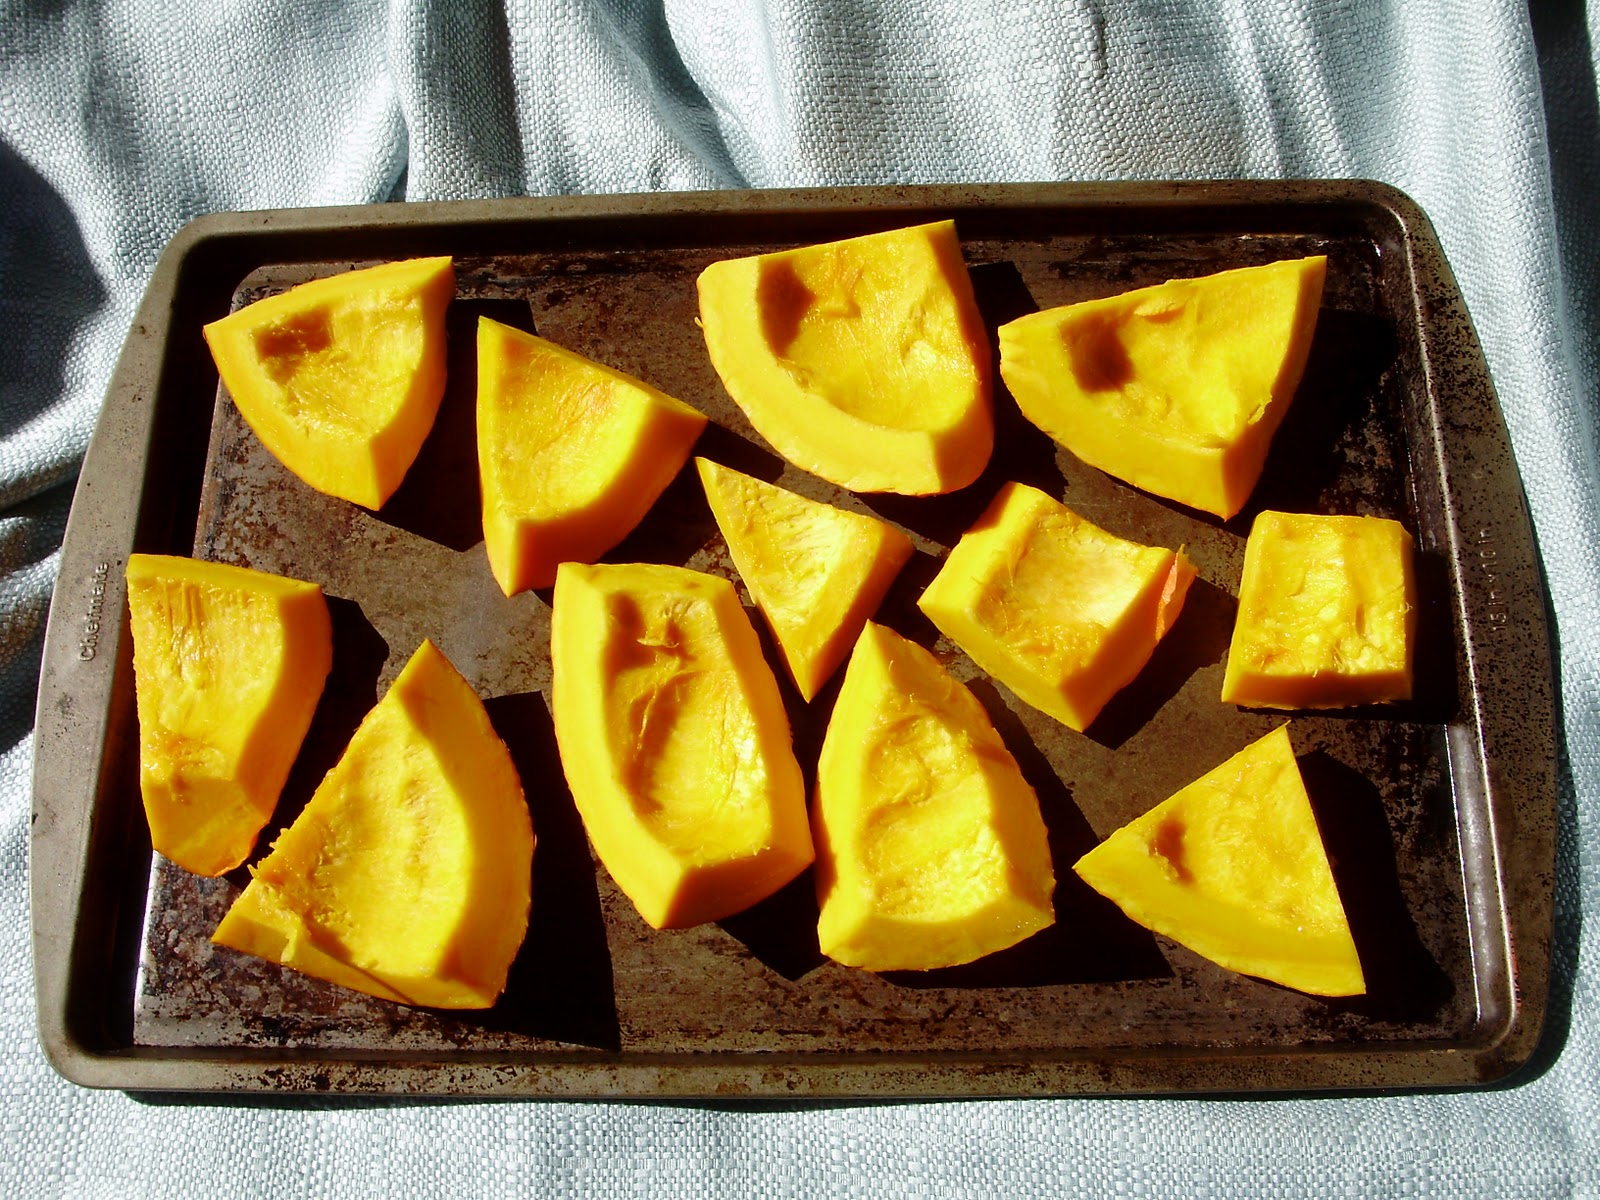
Cut the squash in half. Scoop out the seeds.

 Cut the halves into smaller pieces, and place on a baking sheet. Bake at 350 F for about 45 minutes, until the squash is fork-tender. Remove the squash from the oven, and allow it to sit until cool enough to safely handle, about 30 minutes.

-->
 Before baking.
After baking. The squash will now be squishy.

--> Scrape the flesh off of the squash rind, and place in a bowl. Squish the flesh with a fork. Alternately, use a food processor.
 Preheat the oven to 350 (again).

-->

In a large bowl, combine the dry ingredients and whisk together to incorporate ingredients.
  
 Add the other ingredients, and mix together until the batter is smooth. There will be some lumpiness if the squash was squished with a fork.
 Fill the cups of a muffin tin until about ¾ full. These don't rise very much, so they could be filled a little bit higher.

Bake at 350 for 20-25 minutes.

Makes 15 muffins.
 These were very good. The muffins were a little dense, but that made them slightly custard-like in texture. As with many gluten-free baked goods, they improved after they cooled down.

Sunday, October 2, 2011

Celebratory Gluten-Free Pancakes

Pancakes that won't make me sick. They also tasted good.

Sunday used to be the day where I slept in late, and would hopefully stumble out of bed in time to get to the second service for church. Given that I was at school Monday through Friday, and usually spent my entire Saturday doing homework, Sundays were reserved for catching up on sleep and finishing up any assignments due the next day. Now, though, Sundays mean work. Usually six or eight hours of it.

I'm working at a hotel now, and the weekends are always busy. I can usually get to church, provided we go to the early service, but even that is pretty iffy, as there is a lot to do at my job that day.

Today, however, was my day off! Because the Man and I no longer see each other much on the weekends, this was a cause for celebration. And on any celebratory day, there should be a good breakfast. With bacon and pancakes. Even if you have food allergies.

Here is what I came up with this morning. These do crumble quite easily, but they generally stay intact while flipping them. They were very light and fluffy, despite being whole-grain.

They tasted fairly plain, thus you can top them with anything you like, such as maple syrup, or jam, heck, use them in a sandwich! If you think a plain pancake is boring, add some cinnamon and vanilla. I used sorghum, millet, and quinoa flours, and they were very good. Also, I fried bacon on the griddle first, and did not clean off the bacon grease. While camping this summer, we figured out that pancakes are really good fried in bacon grease. Just a friendly hint, if you like and can eat bacon.


Celebratory gluten-free pancakes

1 cup of GF flour (5 oz/140 grams)
1 TBS baking powder
½ tsp salt

2 TBS oil
2 TBS Agave nectar (or honey or maple syrup)
1 egg
½ cup non-dairy milk (I used almond)
1-3 TBS water, if needed

Whisk together the dry ingredients. Add in the oil, agave, egg, and non-dairy milk. Stir together. If the batter is very thick, thin it with water, adding one tablespoon at a time.

Heat your griddle to about 350 degrees F. Or, heat a skillet over medium-high heat. Pour a small amount of batter onto the heated surface, as small pancakes are less likely to crumble when turning.

The pancakes are ready to be flipped when a few bubbles appear on the surface.

Makes 15 small pancakes, serves 3.


 Fry some bacon first, unless, you know, you don't eat pork.
These pancakes are ready to be flipped.
 Pancakes! 
 This was breakfast. It was awesome.

Thursday, September 29, 2011

Gluten free bread with polenta


Finally, homemade gluten-free delicious toast!

-->
Good gluten-free bread seems to be a holy grail of GF baking. After eating rice bread that feels and tastes like Styrofoam, or a tasty but tiny loaf that costs $6.50 and is usually out of stock at my store, I get why. I used to pretty much live on toast; it is simple and tasty, and a delicious vehicle for condiments that I like, and it was nearly a tragedy when I first began seeking gluten-free options. What does one do without peanut-butter toast in the morning?

Normally we would just avoid toast and sandwiches altogether, but I just started a job (yay!!) and need convenient meals I can eat while standing. So that is where this bread fits in.

I tried a number of different recipes from different sources, and the one I ended up liking best was this  from the Gluten-Free Goddess. I recently discovered her blog, and I really love her recipes! This is my adaptation, based on what I like, and the humid Pacific Northwest climate I live in. Based on humidity, or the flours you use, you may need to adjust the flour or water. The recipe I linked you to has a lot of commentary on other ways that the recipe can be modified based on climate etc.

My flour mix that I have been using is a ratio of 2:1:1:1:1 of sorghum, millet, quinoa, oat, and brown rice, respectively. Use the flours you like, and as always, make sure they are certified GF.

The Man and I had people over a couple of weeks ago, and fed them this bread. No one complained, even though they can all eat gluten, and they seemed to think it was perfectly fine bread. As a GF baker, I know I have achieved success when people without food allergies like it! The polenta makes this a bit crunchy (though if having the granules in your bread will bother you, use cornmeal or maybe almond meal) and using either honey or molasses makes this bread tender.


-->
Gluten-free bread with polenta

1 c warm water (plus 0.5 c)
2.25 tsp yeast
1 tsp sugar (brown or white)

4 Tbs olive oil
3 Tbs honey or molasses
2 eggs
0.5 tsp lemon juice

0.5 c polenta or cornmeal
1.5 c GF flour mix plus 0.5 c
0.5 c cornstarch
1 tsp sea salt
1 tsp xanthan gum

Combine the 1 c water, yeast, and sugar into a bowl. This step is “proofing” the yeast. Let this mixture sit until it becomes foamy, about 10 minutes.

Add the other wet ingredients and stir. Note that if you measure out the olive oil prior to the honey or molasses, and use the same measuring spoon, then the honey/molasses won't get stuck to the spoon.

Add the polenta to the wet ingredients, and stir for a minute, then let sit for five to ten minutes, to allow it to soften (Edit: if using polenta rather than cornmeal, let it sit 15-20 minutes so that it can soften better, I have found that 5 minutes isn't long enough and you end up with granules in the finished product). Add the 1.5 cups flour, cornstarch, sea salt, and xanthan gum, and mix together.

Depending on humidity or the property of flours you use, the dough may be either too wet or two dry. It will not look like normal glutenous dough at all, it should be the same consistency as thick muffin batter. If the dough is too dry or thick, add water in a tablespoon at a time. If the dough is too wet (it should not be as wet as cake batter!) then add flour a tablespoon at a time.

When the dough is the right consistency, pour it into a greased bread pan. Cover with a cloth and let the bread rise for 2 to 3 hours.

Preheat oven to 350 F.

Bake until the top is golden brown, and the insides are fully cooked, about 45-50 minutes. Remove from the pan and put onto a wire rack immediately, this prevents the crust from getting soggy.

Yields one loaf.


 Proofed yeast is foamy
 The dough will look like thick batter, and should be rather stiff.
 The dough does not smooth out during baking like glutenous bread would, so be sure to smooth out the dough with a wet spatula or a spoon.
 Smoothed-out dough
This is after the bread has risen. I made a double recipe, hence the two loaves.
 The loaf after baking. The bread doesn't "poof" like what I am used to, but that's ok.
 Bread!
You know you are a GF baker when you get really excited about air pockets.

This makes really good toast, and is pretty decent in sandwiches. It tastes good, freezes pretty well, and makes me happy. I will definitely keep tweaking this recipe, but this will continue to be my go-to bread recipe when I don't want to pay $6.50 for store GF bread.

Monday, September 12, 2011

Chocolate Zucchini Muffins

Ah, September. The time of year where kids are going back to school, the weather is beginning to turn, and your friends and neighbors try to pawn off ten-pound zucchinis on you.

I love zucchini, I really do. I have even (unsuccessfully) tried to grow them on my porch before. But it seems funny when I go to church or volunteer at the local high school, and somehow come back with enormous zucchini, because I cannot resist free produce.

Fairly recently, I used up maybe a pound of one such squash (they are a summer squash according to the wikipedia) in ratatouille, and another half-pound of it in soup. But I still had about a foot of the vegetable to use up. I looked at a number of zucchini bread recipes, but most of them used a mere cup of zucchini.

I stumbled upon this recipe, and the fact that it used up 3 cups of zucchini meant I had to try it. It was already a really good recipe, but I made a few tweaks, including making it dairy-free without using soy.

This is the sort of muffin that seems rather virtuous; it contains vegetables, whole grains, and not too much fat or sugar. I like that it isn't very sweet, thar makes it a pretty good breakfast food.

I used an all-purpose gluten-free flour mix, which was about 2:1:1:1:1 of sorghum, millet, quinoa, oat and brown rice flour, respectively.

Make sure that your flours, vanilla extract, cocoa powder etc. are gluten-free and dairy-free, if those allergies apply to you.


Chocolate Zucchini Muffins, gluten and dairy-free

2 cups GF flour mix
1.5 tsp xanthan gum
0.5 tsp salt
1.5 tsp baking soda
0.5 c cocoa powder
1 tsp cinnamon (optional)
0.5 c granulated sugar
0.5 c brown sugar
3 large eggs
0.5 c vegetable oil
1 tsp vanilla extract
3 cups shredded zucchini

Put the shredded zucchini into a strainer over a bowl, and gently press down on the zucchini with the back of a spoon, to drain. Allow excess liquid to drip off while you make the batter. Set aside.

Preheat oven to 350° F.

In a medium bowl, whisk together the flour, gum, salt, baking soda, and cocoa powder. Set aside.

In a large bowl, stir together the sugars, eggs, vegetable oil and vanilla until the batter is combined. Stir in the zucchini. Stir in the flour mixture.

Fill muffin tins half full of batter. Alternatively, place the batter in a bread tin.

Bake muffins for 23-30 minutes, and loaves for 50 minutes. After the muffins or loaf has cooled for five minutes in its tin, remove the muffins/loaf and place on a wire rack to finish cooling. This prevents a soggy surface.


Makes 24 muffins

Sunday, July 31, 2011

Gluten-free vegan chocolate chip cookies


Food intolerances are a pain in the ass.

There, I said it.

Since my last post, my full food allergies/intolerance tests came back, and the list is a lot longer than gluten. Dairy is no longer allowed. The exception, for now, is butter. My doctor says it is ok because it is 99% fat, and most of my issues are with the proteins and sugars in milk. But there is a chance that I am so sensitive to it that I may need to cut that out of my diet as well. I have hopes that I will be allowed small amounts of dairy after it has been eliminated from my diet for a while, but there is no guarantee of that.

I also am not supposed to have asparagus, amaranth, pineapple, or bananas, as my body makes antibodies against them. No amaranth is fine by me, as most GF products don't use it. No asparagus is also fine, as I do not like how it tastes. I am sad about the bananas; they are convenient breakfast food and I love banana bread. However for reasons highlighted in this article, I had already been limiting my consumption of them. I am sad about pineapple, but we didn't eat it that often anyway, as we try to eat our produce in season.

I am able to look on the bright side about a lot of these new food intolerances, but I will be honest with my readers and say that I am taking the no-dairy pretty hard. Unlike traditional glutenous products like bread, there is no good substitute for cheese. True, there are some almond and soy products that look fairly promising, but I just ate some decent almond “cheddar” with my lunch that, after looking at the packaging, turns out contains casein. Casein is one of the proteins in milk, and it is bad for me. There is so much more potential for cross contamination now, and a product that says “non-dairy” or “lactose-free” is not neccesarily dairy-free.

About half of the times I have gone out to eat in the last few months (which is increasingly difficult) I have had to send back my order because there is cheese or bread crumbs on it, when I asked for no cheese, or said “no gluten”. Which, look, I used to work in food service and I know that it can be hard to keep track of customizations to orders, but this is literally playing with my life. I have had to miss several days of work due to accidental cross-contamination now. Also, many people were sympathetic with me about going gluten-free, but suddenly when you add “dairy-free” to that list, a number of people reacted drastically. “I could never do that!” or “I would miss cheese/bread/bananas (etc) too much” or my personal favorite “well what CAN you eat?” I know that people generally aren't well educated about allergies/intolerances until they have to deal with it themselves (and I am guilty of this as well) but I just feel so different from people now. I hate that when I go out to eat in groups, we have to eat in places that won't make me sick; that I have to change the group agenda.

Well, that was a longer rant then I expected.

There is a lot to be happy about, though. First off, why wouldn't I be glad to stop eating the things that were making me sick? I do have more energy now, there is no way I could have worked an 8 hour day even a few months ago. The Man and I still have now idea how I was able to finish school when I had maybe four hours of energy on a good day. And there are a lot of places that make GF and DF foods now. I live in an area that is actually very good about trying to accommodate dietary needs. Also, there is still so much food that I can eat, and I try to do so happily. And, I can make my own baked goods when I am sad that there is something I can't have.

On the subject of making my own baked goods, I made some cookies! At my internship, I am due to make a presentation soon. In the lab I am working in, people always bring snacks to the meeting when they are speaking. Most people bring cookies, usually storebought. Well, I don't want to buy something I can't eat, nor do I want to spend the money on one of the brands that I can (GF baked goods are 2-3 times the cost of glutenous baked goods). And sometimes you just want to eat homemade cookies! So here is a recipe I am am experimenting with, that I hope people will enjoy.

This is adapted from Roben Ryberg's book “You Won't Believe It's Gluten-Free!”

I went ahead and made this recipe vegan too, in order to accommodate more dietary needs.

Some of the ingredients are measured in grams. This is because it is much more precise, and very useful in gluten-free cooking. This post explains why.

Also, please make sure that all of your products are gluten-free before you buy them. I have had a lot of unpleasant surprises when I neglected to read labels even on things that should be GF, such as vanilla. Bob's Red Mill has a great line of GF flours, Thai Kitchen makes GF products, and there are several brands of baking powder and cornstarch that clearly list “gluten-free” on their packaging.

Gluten-Free Vegan Chocolate Chip Cookies

1 Tbs ground flax seed
2 Tbs nearly-boiling water
¾ cup coconut solids*
¼ cup coconut water *
115 grams (1/2 cup packed) brown sugar
80 grams (2/3 cup)cornstarch
50 grams (1/3 cup)GF flour mix**
1 ½ tsp baking powder
¼ tsp salt
1 ½ tsp vanilla
1 ¼ xanthan gum
1 cup of chocolate chips

Make a “flax egg” in a large bowl by whisking the water with the flax seed until it forms a paste. Let stand for 5 minutes.

Add the coconut solids and water, and the sugar to the same bowl. Cream together until smooth.


Add the other ingredients, except for the chocolate chips, and mix together. Add the chocolate chips.

You can see how sticky the dough is.

Optional: Leave dough in the refrigerator for 1-3 hours. This allows the liquid to absorb into the flours better, and makes the dough easier to handle.

Preheat oven to 375. Scoop 1-2 Tbs of dough with a spoon onto a cookie sheet lined with parchment paper or a silpat (if you have neither, then grease the cookie sheet very well). Because these do not spread out when baking as normal dough would, flatten the balls to ¼ inch thick. This is easiest when done with a spatula that has been sprayed with cooking spray.

Bake for 8-12 minutes, depending on how crisp you like your cookies.


So how were these? I enjoyed them quite a bit, but they aren't quite right yet. They are very soft and fluffy, almost like a little pancake! This was improved by baking for 11 minutes instead of nine, and by flattening the cookies more. The flax made them taste a bit more “whole grain” then I wanted in my dessert (normally I love whole grain!) Also they could be a little sweeter. Next time, I will probably use butter or margarine and an egg instead of coconut milk and flax seed. However, they are very good if you want a soft, gluten-free, vegan cookie.

Edit to add: these had a much more cookie-like texture the next day.

* I put a can of coconut milk in the fridge, which allowed the solids to float to the top, and the coconut water to settle. I suspect that pouring a cup of coconut milk straight in this recipe would not work, as the extra fat is needed to replace the butter.

** I made up a master mix of all-purpose GF flour from white and brown-rice flour, teff, almond meal, oat flour, and sorghum. I love it for most of my baking. There are articles on how to come up with your own mix here and here.