Wednesday, December 29, 2010

Spiced Yam Bread


For Christmas, I made a batch of yam bread to bring to a potluck. Its a lot like pumpkin bread, but with an ingredient that is easier to find year-round. Also, I just like yams.

I came up with the original recipe some months ago, and thought it was very holiday appropriate. That particular recipe turned out a bit better then this batch did, as I wasn't very precise about scaling up the ingredients here to make two loaves instead of one big loaf.

But I am going to post the recipe anyway, because it tasted really good, even though the bread was a bit too moist, and the loaves were flat. I think it needed more flour and more baking powder.

Anyway, here is the recipe I used this time, despite it being slightly flawed. If I was going to try this particular iteration again, I would use 4 tsp baking powder, and 1.25 or 1.5 cups of each type of flour.

Wet ingredients:
3 eggs
2/3 cup brown sugar (I know that sugar isn't a "wet" ingredient, but it incorporates better at this stage)
2/3 cup granulated sugar
2 1/2 cups mashed yams
1 tsp vanilla extract
1 stick of butter, melted
1/3 cup vegetable oil

Dry ingredients:
1 cup white flour
1 cup wheat flour
1 tsp cinnamon
1/2 tsp nutmeg
1/2 tsp ginger
3 tsp baking powder
2/3 cup craisins

Start by baking halved yams in a glass pan at 375 until the yams are cooked, about 45 minutes.


Cover pan with foil and let sit for 15 to 20 minutes. This helps loosen the skin.


Remove the yam skins like so:


And mash the yams. I preferred this bread with roasted yams, as demonstrated here with sweet potatoes, but simply baking works well too.


Mix together all of the wet ingredients in a medium-sized bowl, and set aside.

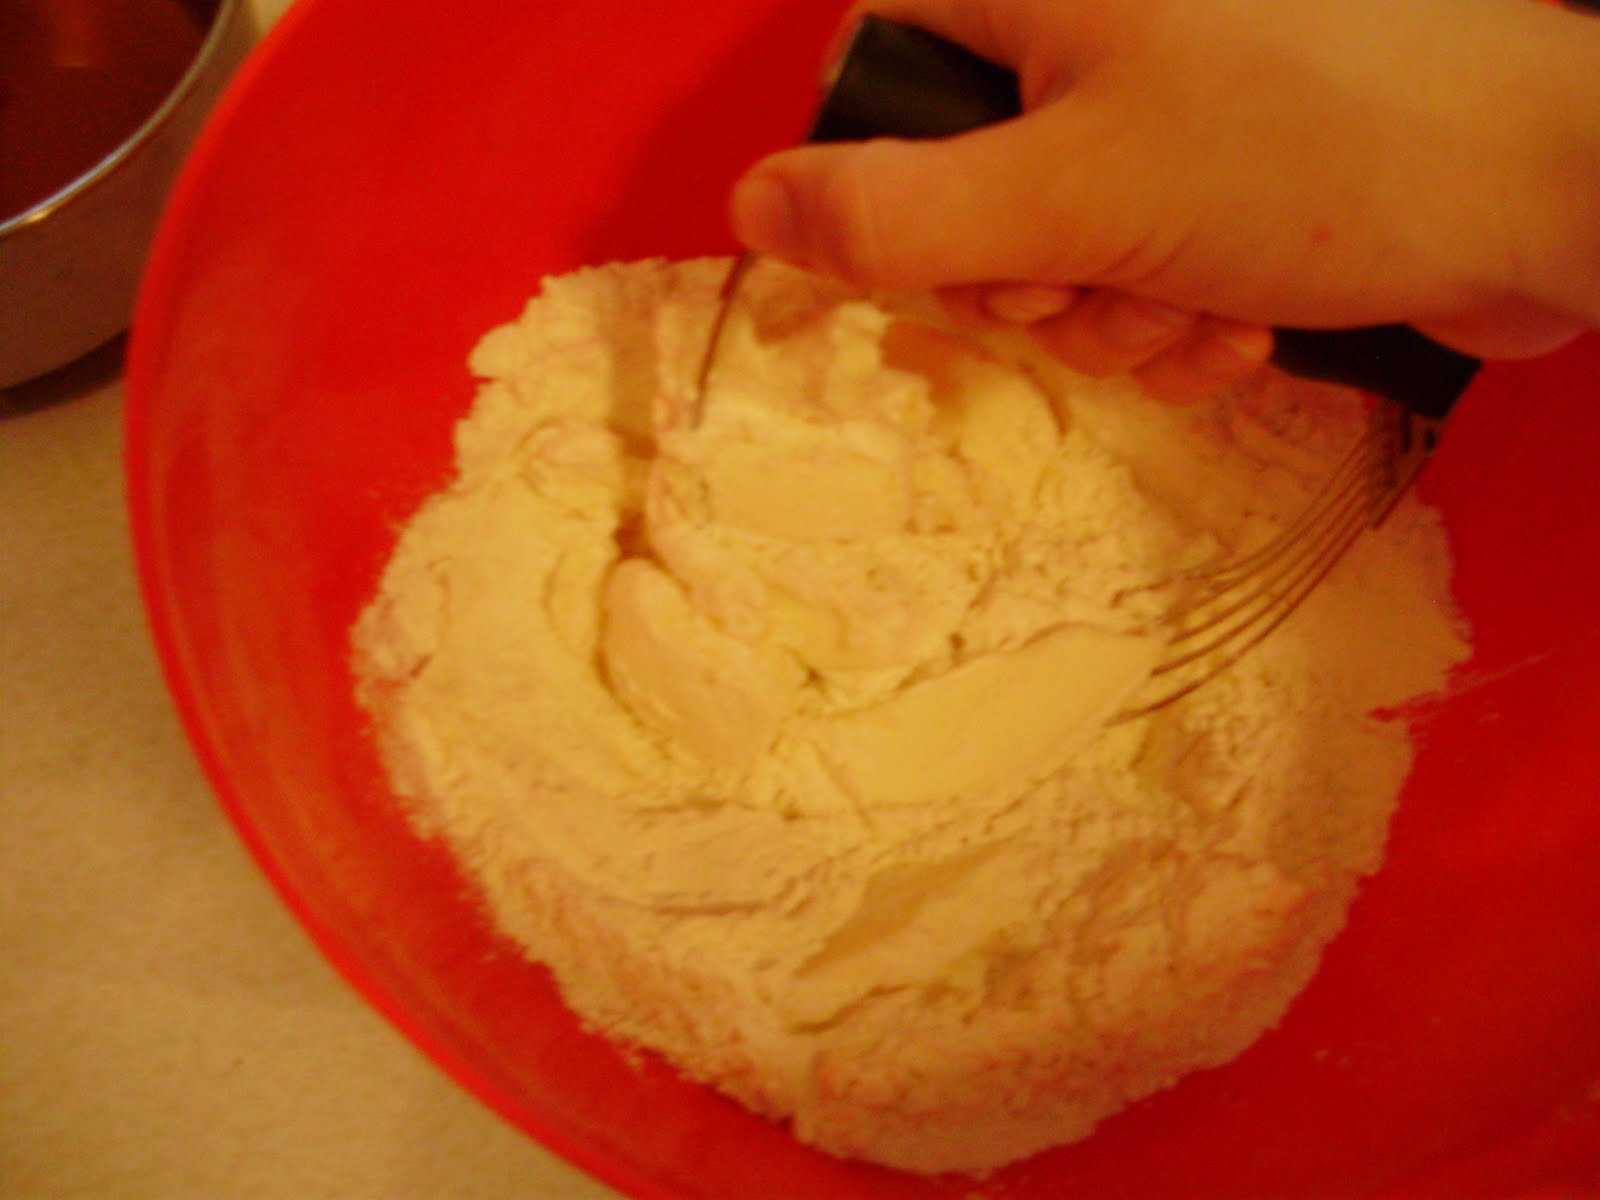
Mix the dry ingredients together in a large bowl, and make a well in the center. Add the wet ingredients and mix together until just blended.

Pour into two loaf pans, and bake at 350 F until and inserted fork or toothpick comes out clean, this was about 50 minutes.

So the loaves were a bit flat as you can see.

The bread was really tasty, so despite its flaws, people enjoyed it.

Monday, December 27, 2010

I'm back! With Cranberries!

I'm back, with some holiday-type recipes! Things have finally slowed down in the Free!Radicals household, as during the Christmas week, the Man and I spent every day doing at least one thing with each other's families. That's fun, but exhausting.

So, have a quick tutorial on how to make cranberry sauce! I have learned that a lot of people are attached to the jellied stuff from a can, but I think it is kind of gross.

Cranberry sauce:

Pick out the bad cranberries from a 16-ounce bag of cranberries. Usually there are only a few, but I had to take out a lot this time. Put them in a saucepan.


Add 2-3 cups of water, and 1 1/4 cups of sugar. You might want to add more sugar if you like your cranberries really sweet, but I do not.


Heat over medium-high, and after a few minutes the cranberries will start popping and turning syrupy.


Though the cranberries pop, you still need to mash the berries.

And you have cranberry sauce!


Normally I add some lemon zest, but i had no lemons. So it is just as simple as water, cranberries, and sugar.

Happy belated holidays!

Monday, November 1, 2010

Butternut Squash soup


I have been absent for about two months. I am sorry, and I don't have a good excuse besides that it is my senior year of college and I am a biology major. Or maybe that is a good excuse. Hmm.

Anyway, butternut squash soup! It is made of win. And squash.

You know it is November when you are filling out your ballot and making this soup (not at the same time).

I adapted this recipe from the crockpot lady, mostly because I had to make dinner between two classes today, and didn't have time to use a crockpot. But she is fabulous and you should read her blog if you own a crockpot, or even if you don't.

Obtain a butternut squash, cut it lengthwise (this is difficult, you;ll need a hefty knife) and put it in a roasting pan in a 375 degree oven for 35 minutes, or until the flesh is soft.

Meanwhile, cut up two apples (fuji or something similar is best, I used granny smith and the soup was a bit too tart for me) and a medium onion into 1 inch pieces (no need to be precise).

Let the squash cool until you can handle it safely (I did not, hence the potholder. Don't be impatient like me.) Then scoop out the flesh.


Put the onion, apple, and squash into a stockpot and and 32 ounces of broth (chicken or vegetable) in the pot. Season with 1/2 tsp pepper, a pinch of salt, and a sprinkle of nutmeg. Bring the pot to a boil, then turn down heat and simmer the covered pot for 25 minutes.

Let the soup cool slightly, and then blend in small batches until the soup is as pureed as you like it. Reheat if necessary, then serve.

This is Free_the_Radicals attempt at fancy food photography. Though the sprinkle of nutmeg and drizzle of olive oil is delicious.

This was quite tasty, though a bit too tart. I think next time I will either use one apple, or two small fuji's. But still good!

Thursday, August 26, 2010

Chocolate Banana Bread


The wonderful thing about chocolate banana bread is that it seems so much more decadent than regular banana bread, but because it uses cocoa powder, not chocolate bars, it is actually better for you! Or at least I suspect it is, given the amazing properties people attach to chocolate's flavenoids and antioxidants (which help neutralize free radicals!).

I digress.

After a camping weekend where the Man and I made breakfast and many people didn't eat the fruit we served, I came back home with too many bananas, and they were turning brown. My answer to too many bananas is always: Banana bread!

No making-of photos today, but here's the recipe, adapted from here.

1 3/4 cup wheat flour (you can use white, but what makes me feel virtuous)
1/4 cup cocoa powder
1 cup white sugar
1 tsp baking powder
1/2 tsp baking soda
1 pinch salt

2 beaten eggs
1/3 cup vegetable oil
2 tablespoons melted butter
3-4 ripe bananas, mashed
1 tsp vanilla extract

Preheat oven to 350 F

In a large bowl, mix together all of the dry ingredients. Set aside.

In a medium bowl, mix together eggs, oil, butter, bananas, and vanilla. Scrape the mixture into the dry ingredients, and gently stir together. (you could add chocolate chips at this point, but why spoil the illusion that this is healthy food? Actually, it is decently healthy.)

Pour batter into a greased breadpan. Bake for 50-65 minutes, it will be done when you stick a fork or toothpick in the bread, and it comes out clean.

Apologies for the blurry picture.

So how was it? Definitely better the next day, but I really enjoyed this. Having more banana then the typical banana bread recipe (normally they say 2) keeps this really moist. I didn't mind the taste of the wheat flour, though the Man said he could tell there was some in the bread, but in my opinion, that is not a bad thing. The chocolate is noticeable, but not in-your-face.

A great way to use up bananas!

Monday, August 16, 2010

Chocolate Guinness Cupcakes!


I had the idea for a cake recipe that combined Guinness (or some other stout) with chocolate about six months ago, but only recently got around to tinkering with a recipe. I have heard of beer bread, and even beer ice cream, so why not a cake? It turns out I am not the first person to come up with the idea, but I gave it my own rendition.

I have to say I am very happy with the results. Aside from the fact that I usually have bad luck with baked goods because dangit, I only measure precisely when I'm in the lab, (where I have the assistance of micropipettes), but also because the stout adds a complexity to the chocolate that I'm pretty sure even non-drinkers would like. It also makes a good leavening agent!

No making of pictures today, but here is the recipe!

**Adapted from this recipe

1 cup of stout
2 sticks of butter
3/4 cup of cocoa powder

2 cups flour
1 3/4 cup white sugar
1/2 tablespoon baking soda
1/2 tsp salt

2 eggs
Rounded 1/2 cup of cream cheese

Preheat oven to 350 F.

Melt the butter in a saucepan. Whisk in the cocoa powder, and add stout. Let the mixture cool.

Blend flour, sugar, baking soda, salt together and blend.

In a large bowl, beat eggs and cream cheese together. (an electric mixer would have made this step much easier!) When blended, add the stout/ chocolate mixture to the eggs about a quarter cup at a time, and blend, continuing this step until the eggs are tempered.
Add the flour mixture and stir until well-mixed.

Fill cupcake liners about 2/3 full. Bake about 13-18 minutes. ( I suspect my old oven runs hotter than most, as most cupcake recipes recommend 350 for 22-25 minutes. Experiment with timing).

Yields approx. 18 cupcakes.

I mixed up a quick buttercream icing, which was good, but not amazing, use your favorite icing recipe.

I want to remake this recipe as a layer cake with ganache filling and a better-tasting buttercream frosting. It would be fantastic!


Friday, August 13, 2010

Lavender Lemonade

It's pretty warm out here lately, and humid, and thus cold beverages have been pretty much a necessity when the apartment is 85 degrees for several hours. I've been drinking lots of iced tea, but I've gotten bored with that, so I decided to make a twist on the classic lemonade today:

Add lavender to it!

So here is what you need to do:

Dissolve 2.5 cups of water and 1.5 cups of sugar together in a saucepan. Bring to a boil, and add 2 tablespoons of lavender buds. Continue boiling for 5 minutes.


Meanwhile, juice 4 big lemons into a pitcher, and add 2.5 cups of water.


Strain the boiling mixture into the pitcher and stir.


Chill the pitcher, and then enjoy! It is delightfully tangy with a hint of floral, and is a good thirst-quencher.

Thursday, July 15, 2010

Shortbread success!


When I wrote about yesterday's shortbread fail, I wasn't lying when I said I was still craving some. Seriously, shortbread cookies are made of win. They are like, the perfect stereotypical English snack to have with tea. Granted, I'm American so that doesn't mean much, but they're still really tasty.

Repost of yesterday's recipe:

1 cup of flour
1 stick of butter, room temp
1/2 cup of sugar (I used brown)
1 tsp vanilla extract
a pinch of salt

I rarely have painted nails, but when I do, they're usually black :D

So, blend everything together, the mixture will look like this after 4 or so minutes of blending.

See how it looks compacted together? after 6 or 8 minutes of blending, the dough sticks together like this and it is done. Stick it in the fridge for a while if you plan on rolling the dough.

Dump the dough onto a well-floured surface, and knead it until it stick together....


like this!

Roll about a quarter inch thick. You will have to flour the rolling pin, and the dough really likes to fall apart. But you are stronger then the dough!

I used a plastic cup as a cookie cutter. It worked better then my real cookie cutter did!

You will probably have to use a spatula to get the cookies off of the counter.

Poke the cookies with a fork, it helps release the steam. Also, my cookie sheet is permanently burned from yesterday's mess. It was a wedding present too :(


I baked them at 425 for 4 minutes, and they were still a little crisp, so maybe they should be baked at 375 for 8-10 minutes.

And the shortbread cookies were a perfect snack with a peach and with some Earl Gray tea. Soo good.

Wednesday, July 14, 2010

shortbread fail


*sigh*

This was supposed to be delicious shortbread cookies. I am seriously craving shortbread still, and I ate the middle out of the least-burnt cookie and it was delicious, so I know that I made up a good recipe. So I might be making this again tomorrow, and actually remember to press start on the timer, dagnabit.

I used the last of my real vanilla extract on these, too :(

Recipe:

1 cup of flour
1 stick of butter, room temp
1/2 cup of sugar (I used brown)
1 tsp vanilla extract
a pinch of salt

Combine all of the ingredients in a bowl, and blend together with a pastry blender until the mixture sticks together (this took me like, 5-8 minutes). Chill the dough, roll out on a flour-covered surface, and cut out shapes. Bake in a 425 degree oven, probably for 9 minutes but I don't know, since I forgot to set the timer :/

Saturday, July 10, 2010

broiled apricots


Yay! Summer is finally here in the Great Northwest. Which means that those of us living in apartments typically do not have AC, and are sweating it out right now. But it also means that local fruit is finally getting in season, if a few weeks late (only one of my tomato plants has even blossomed).

Inspired by Gluten-Free Girl's latest post, I made a very simple dish out of some local apricots, and it was yummy.


Start with a greased cast-iron skillet. I love cast iron. It is both awesome cookware and a formidable weapon. (Kidding!)

Cut apricots (and I threw a peach in there too because it was getting soft) into quarters and put in the pan. Sprinkle lightly with sugar, chopped rosemary, and chopped mint leaves.

Bake in the oven at 375 F for 20 minutes, and then broil for 3 minutes, watching carefully.

These broiled for 4 minutes, which was obviously a bit too long.

Aaaaand eat them! These would be good on ice cream, mixed into yogurt, or even into oatmeal. Plain is nice too.

I had to add more sugar at the end because even though the apricots were local and supposedly in season, they were dang sour. A bit more sugar fixed that though.

I totally want to try this again with peach halves and basil. Mmm.

Happy summer (finally) everyone!

Sunday, June 27, 2010

Fresh Cherry Tart


Yaay! Cherry season!

I finally made a successful tart! (I've made a couple with my new-ish tart pan, but nothing I was proud of).

A fresh cherry tart. With cherries we bought at a stand while on a day trip to Hood River. Good times, that.

Right, so pretty much the exact reason why I ordered a tart pan and a cherry pitter with one of the gift cards we were given at our wedding was to make cherry tarts, and cherries are finally in season, so I did just that this evening, heavily inspired by this recipe.

And here is how to make your own.

Begin by pitting 2 lbs of fresh cherries. Since the fruit is really the highlight of the desert, make sure you are using tasty fruit that is in season.
I'm not going to lie, the fact that the cherry juice splatter looks a bit like blood kind of amused me. Man, biologists are weird.

Toss the cherries with 2 tablespoons of sugar and a half teaspoon vanilla extract, and let sit while you make the crust.

Simple syrup infused with vanilla would have been better, but I am lazy sometimes.

For the tart shell, blend together 1 1/2 cups of white flour, a stick of softened butter, and 2 tablespoons of sugar. Blend until the mixture looks like crumbs.

Then add a teaspoon of vanilla extract, a half teaspoon of almond extract (both extracts are optional, but they highlight the cherry flavor) a pinch of salt, a tablespoon of cream, and enough water to make everything just barely stick together. I think I used about 3 tablespoons.


You'll get a wad of pastry that should just barely hold together. Flatten the ball into the tart pan, until there is an even layer of pastry covering the entire pan.

Like so. Prick all over with a fork, and bake at 325 for 12-15 minutes. (you're technically supposed to use pastry weights to ensure even baking, but meh. I warned you of my laziness earlier.)

Let the tart shell cool for 5 or so minutes, then arrange the cherries so that there are no gaps in the tart. If you like your cherries really fresh, then you could be done now.

Buut I wanted a warm tart, so I baked it at 375 for 5 minutes.

It was good, and The Man really liked it.

And since you are essentially eating cherries and shortbread, you only have to feel sort-of guilty for eating an extra piece.

One note, because the whole ensemble is baked for so short a time, I didn't want to try and use any custard to hold the thing together, so the cherries will fall off of the crust, like in the picture below. While that didn't bother us at all, if you want to serve this for company, you may want a prettier recipe, like one of these:

http://www.joyofbaking.com/CherryTart.html

http://www.epicurious.com/recipes/food/views/Prune-Cherry-and-Apricot-Frangipane-Tart-350630


Sunday, May 30, 2010

brown-butter chocolate chip cookies


So why am I showing you cookies in a paper bowl that are overexposed?

Because my camera is a point-and-shoot, and because I didn't have paper plates. Also, my husband and I are moving, and all of the dishes are packed. But I wanted to give my landlady some cookies! So there.

Anyways, they may look like innocuous chocolate chip cookies, but they have a secret. (also, I almost always manage to burn cookies, so they are a victory!)

The secret is brown butter. It makes these cookies nutty and taste slightly caramelized, and more interesting.

So... here is my recipe for them. It is inspired by the recipe on the back of the Nestle's Tollhouse chips bag, but I made plenty of changes.

Brown-Butter Chocolate Chip Cookies
Makes 2 dozen

1 cup plus 2 tablespoons flour
1/2 tsp baking soda
1/2 tsp baking powder
1/2 tsp salt
1 stick butter (note: it has to be butter for this recipe, as margarine cannot be browned)
1/3 cup brown sugar
1/3 cup granulated sugar
1 tsp vanilla extract
1 large egg
12 oz dark chocolate chips (I actually used 6 oz, but 12 would have been ideal)

Combine flour, salt, baking powder and baking soda in a small bowl. Set aside.

Brown the stick of butter in a small saucepan. (If you have never done this, here is a tutorial)

Meanwhile, mix sugars and vanilla in a larger bowl. Once the butter has cooled slightly, whisk it into the sugars. Add the egg after the sugar/butter mixture has cooled even more, or you could poach your egg!

Gradually incorporate flour by whisking until smooth. Add chocolate chips, and then chill the dough for a half hour in the fridge.

Meanwhile, chill your baking sheet in the freezer, this helps keep the edges of the cookies from getting crisped.

preheat oven to 375 F

scoop walnut-sized balls onto the sheet. (if you are paranoid about burning like I am, you can chill the dough on the sheet for another 15 minutes)

Bake for 8-10 minutes.

Enjoy!

Tuesday, May 25, 2010

More things to do with marzipan

Have extra marzipan from making cake with it? Make candy!


There is nothing like coming home after a long day of using sterile cell culture techniques and making a huge mess in your own kitchen.

Though it does strike me as funny that I cook in a lab coat (seriously, they are better than aprons) but don't use them in the lab.

So today I made about 3 dozen rolls, a pot of ice tea, truffles, and am about to make spaghetti.

I'll show you the dinner rolls in another post, but because they are really easy, I'll show you the marzipan truffle-things that I made.

Start by slicing the marzipan about a quarter to a third of an inch thick.

Meanwhile, melt some chocolate (didn't measure. Sorry). You can do that over a double boiler, or you can put it in the microwave for bursts of 25 seconds to avoid scorching it.

I recommend the microwave.

Please don't do what I did and try to add cream, it just made the whole thing seize up :( What a mess! But it's friggin' chocolate, so of course I didn't let it go to waste.

Okay. So they easy thing to do would have been to dip the marzipan slices into the melted chocolate using a fork, then let them cool on a cookie sheet.

I managed to get a couple of them dipped, as I had a few extra chocolate chips that i melted. They are the rectangular pieces in the photo below.

Also, dusting them with cocoa powder looks nice, but is optional.


The truffle-shaped ones were made by rolling the marzipan into a ball, then squishing the seized chocolate around the marzipan and rolling. It was very messy, and also very delicious. But I didn't take pictures because it takes two hands and does not look pretty.

So, if you don't try to add cold liquid to the melted chocolate, this is actually very easy.